Terra Oracle AI Scanner - User Guide
Terra Oracle AI Scanner – Complete User Guide
Table of Contents
- System Overview
- Main Navigation
- User Workflow: From Setup to Data Download
- Detailed Feature Guide
- Tips for Optimal Use
- Troubleshooting
System Overview
The Terra Oracle AI Scanner is a hardware soil analysis device that mounts to vehicles (ATVs or other vehicles) for high-precision field scanning. This user guide covers the web-based interface that controls the Scanner and manages agricultural scanning operations. The interface provides real-time sensor monitoring, scan management, data visualization, and system administration tools.
The Scanner features:
- Plug-and-Play Design: Easy mounting on ATVs with wireless operation
- Multiple Integrated Sensors: Gamma radiation, optical, GPS, environmental sensors
- IP67-Rated Housing: Waterproof and dust-resistant for harsh field conditions
- Wireless Connectivity: Connects to tablets/smartphones via Wi-Fi
- Built-in Work Light: For night operations
Main Navigation
The web interface consists of 6 main sections accessible via the sidebar:
- Dashboard - Main scanning interface and real-time monitoring
- Database - Scan management and data download
- Sensors - Individual sensor monitoring and calibration
- System Status - Hardware health monitoring
- Settings - System configuration
- Power - System shutdown/reboot controls
User Workflow: From Setup to Data Download
Phase 1: Hardware Scanner Setup
1.1 Mount the Scanner
- Mount the Scanner to your ATV or other vehicle using the plug-and-play mounting system
- Connect Power using the supplied cable to your vehicle’s 12V battery
- Verify Mounting - Ensure the Scanner is securely attached and level
- Power On the Scanner hardware unit
1.2 Connect to Scanner Interface
- Enable Wi-Fi on your tablet or smartphone
- Connect to the Scanner’s wireless network
- Open Web Browser and navigate to the Scanner’s IP address at 10.10.10.1
- Optional Internet Connection - For satellite or OpenStreetMap layers, also connect to your local mobile internet network (e.g., 5G)
- Verify Connection - Confirm all sensors show online status in the header
Phase 2: Create and Start a New Scan
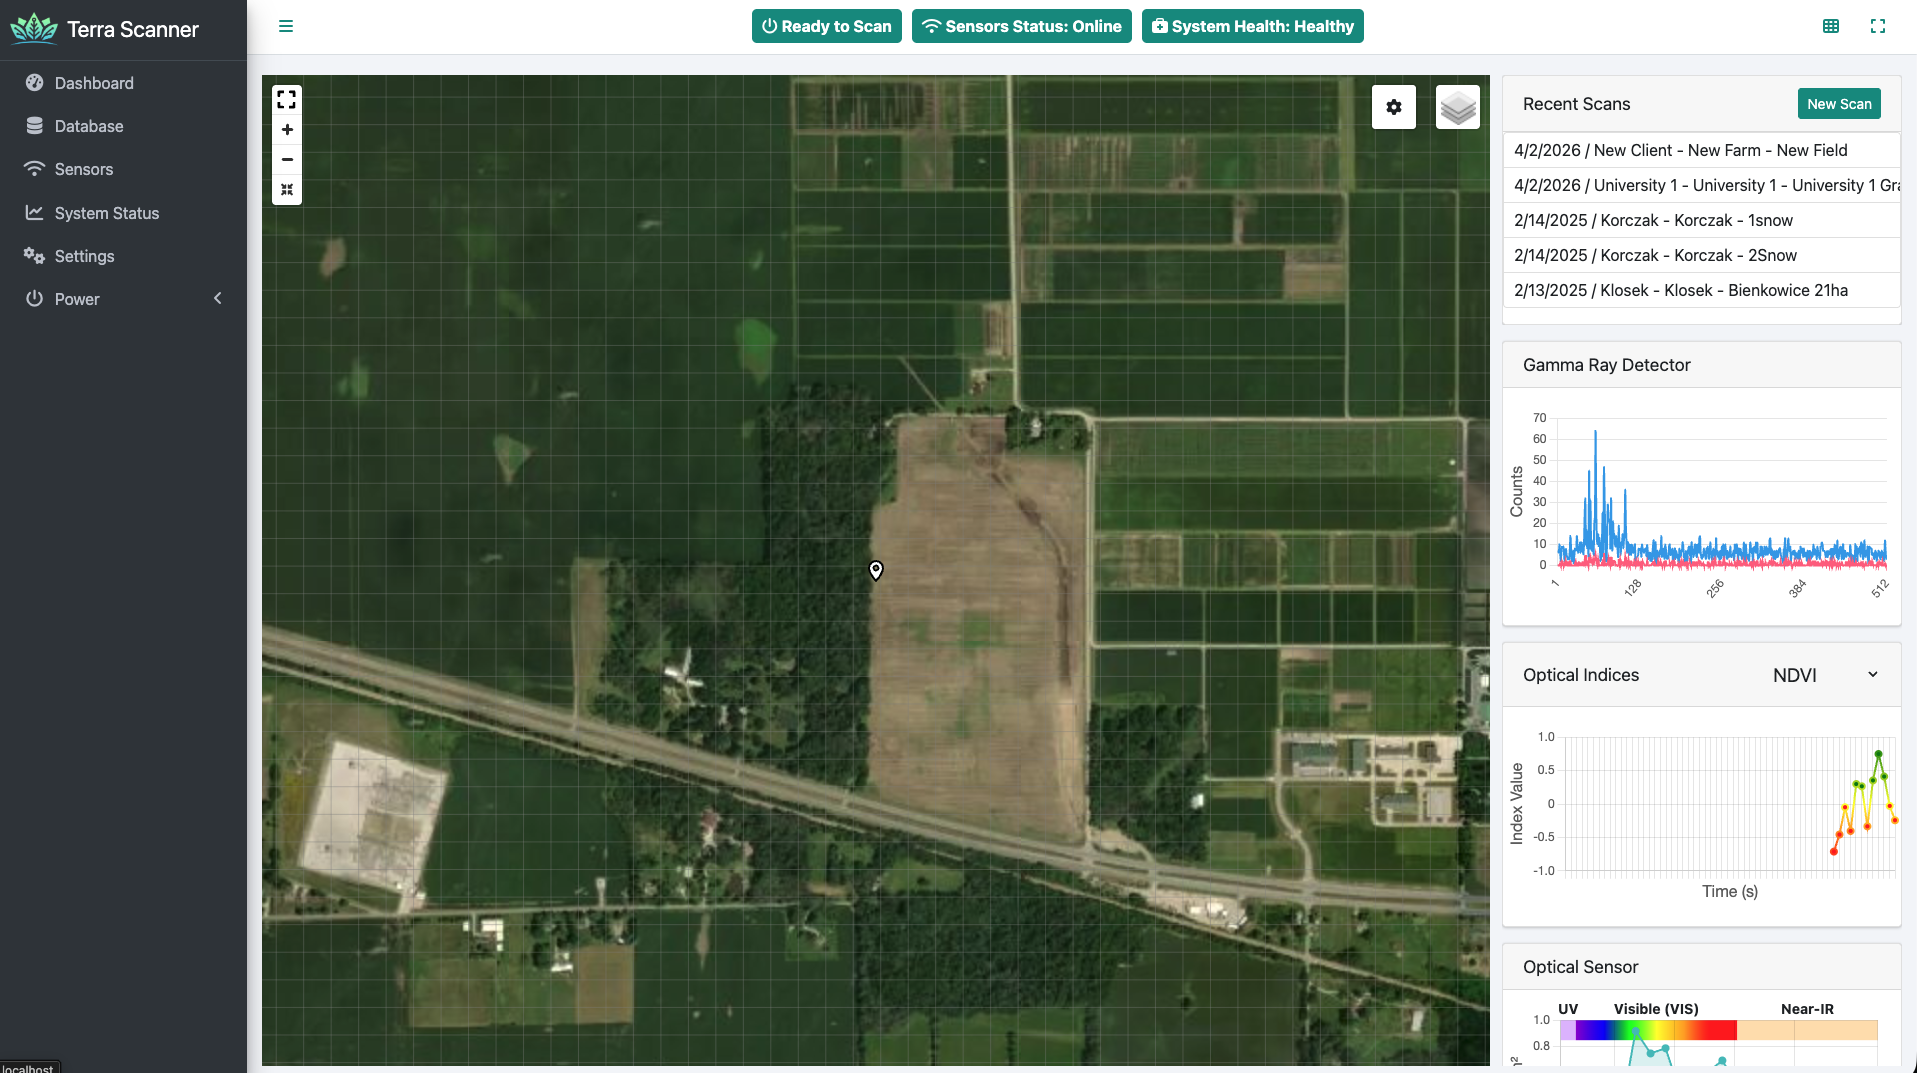
2.1 Access the Dashboard
- Open your web browser and navigate to the scanner’s web interface
- The Dashboard page opens by default, showing the main scanning interface
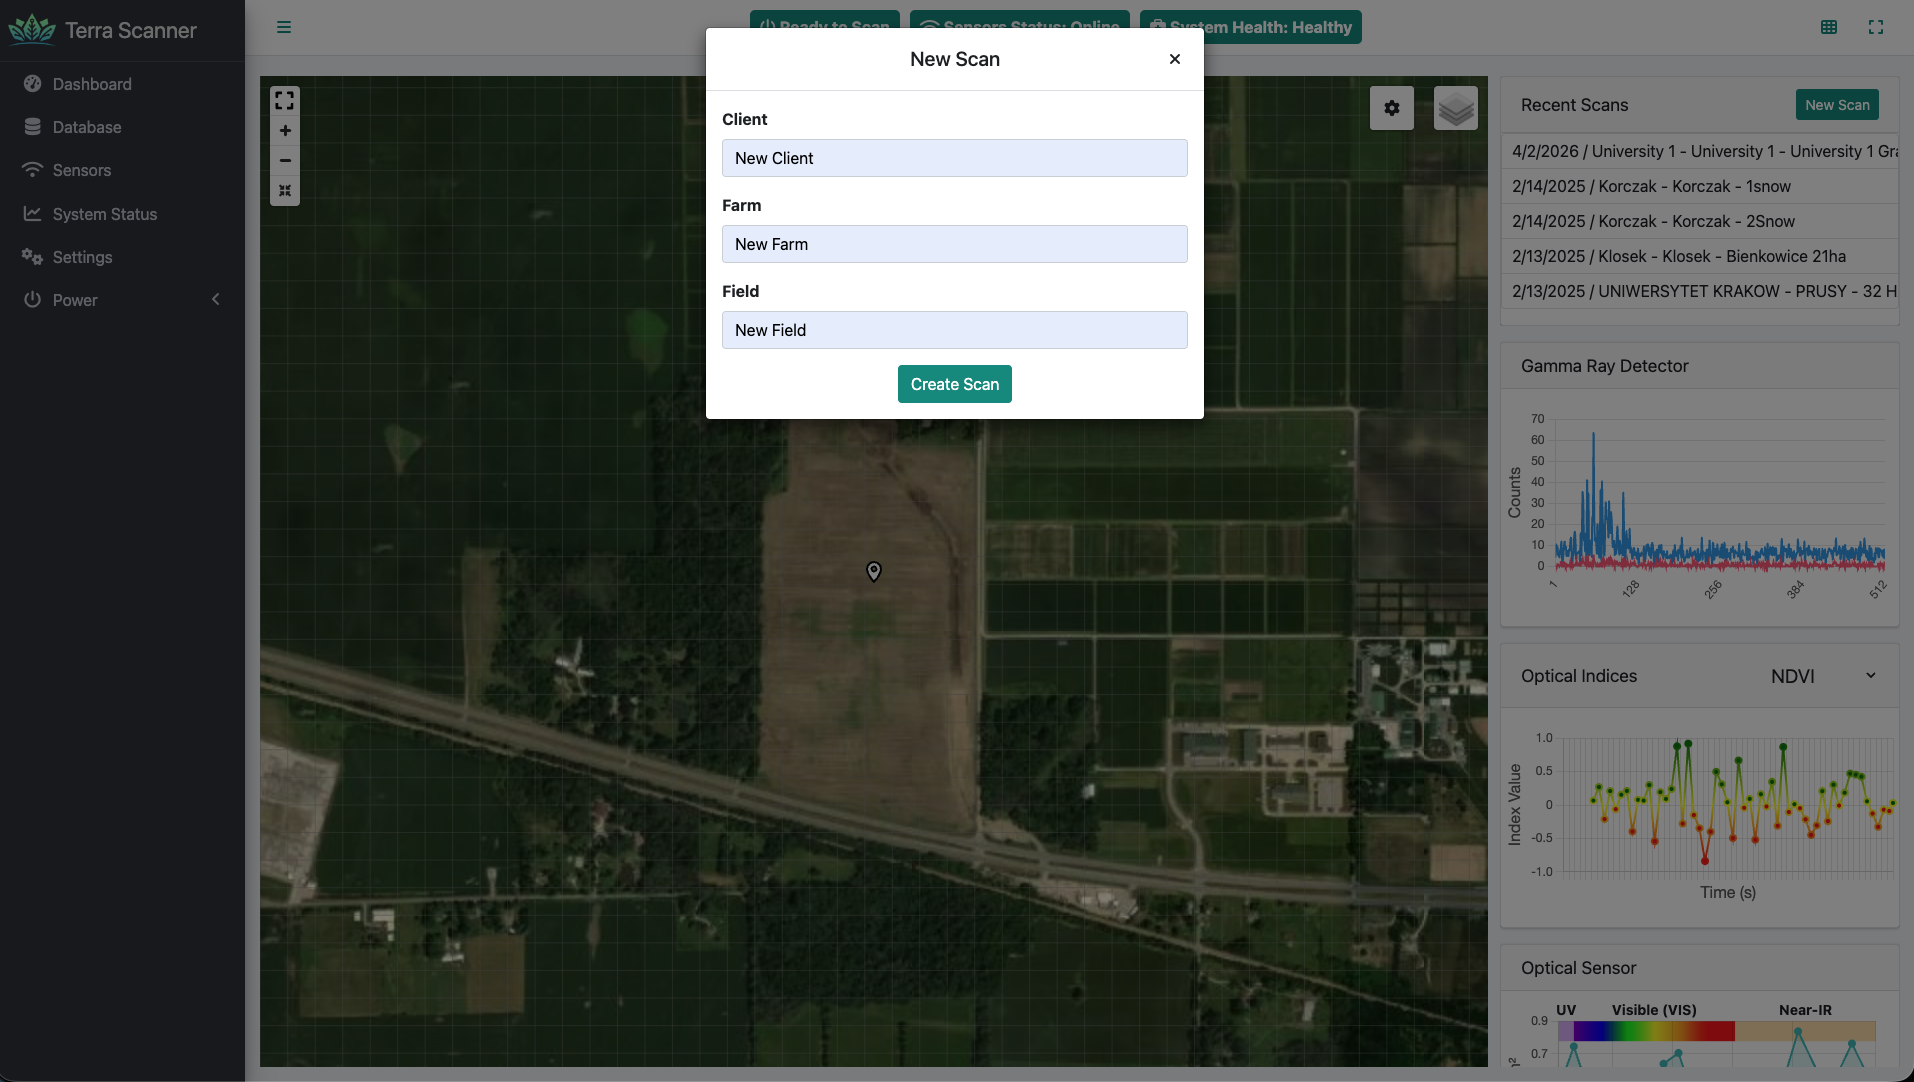
2.2 Create a New Scan
- Click the “New Scan” button in the Recent Scans widget (right sidebar)
- Fill out the scan details in the modal dialog:
- Client: Enter the client/customer name
- Farm: Enter the farm name
- Field: Enter the specific field identifier
- Click “Create Scan” to initialize the new scan
2.3 Navigate to Starting Point
Drive your vehicle with the mounted Scanner to the designated starting point of your field. The system provides up to 8,000 data points per hectare for ultra-high-resolution mapping.
The main map interface will display:
- Real-time GPS position (white arrow marker when moving, location pin when stationary)
- Grid overlay for navigation reference
- Satellite or street map background (configurable)
- Current GPS fix status and satellite count
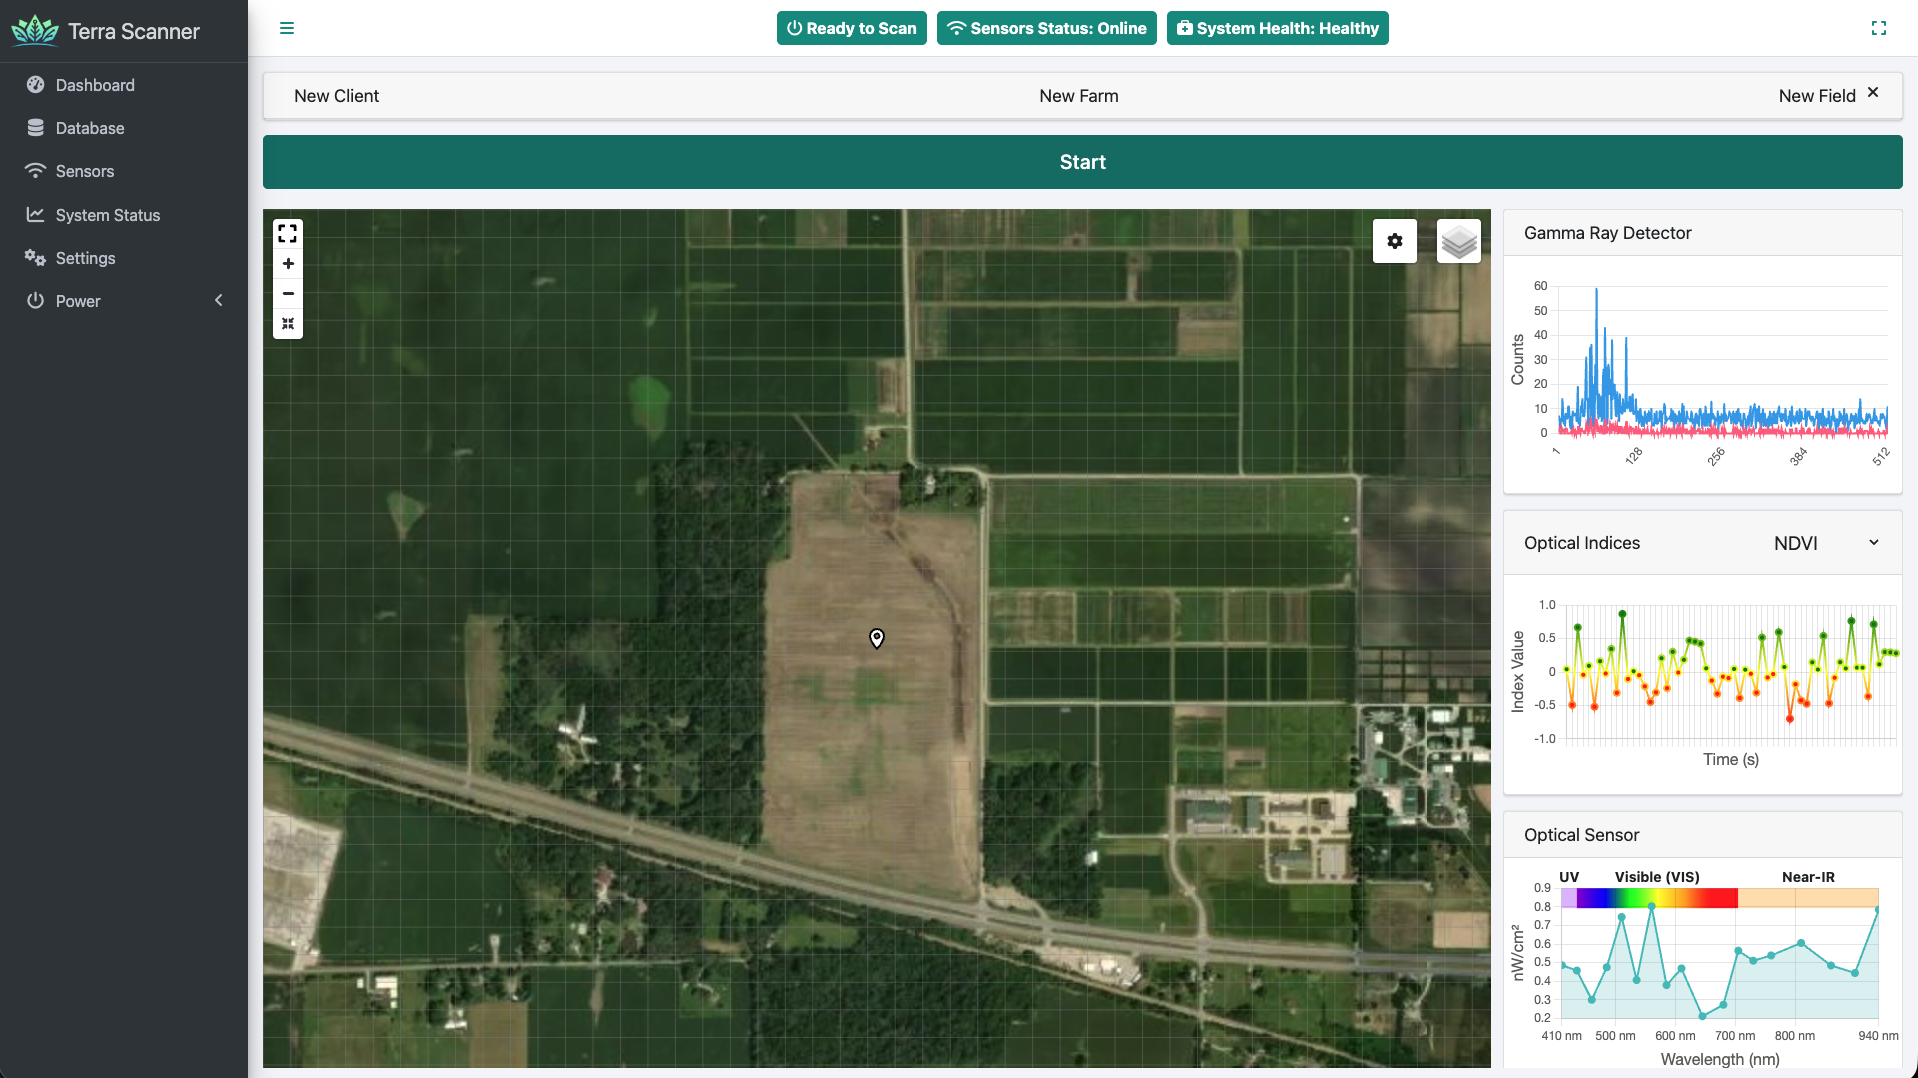
2.4 Start Scanning
- Once positioned at the starting point, click the large green “Start” button
- The interface will:
- Enter fullscreen mode automatically
- Collapse the sidebar for maximum map visibility
- Begin real-time data collection
- Show colored circles on the map representing scan data points
2.5 Monitor During Scanning
The interface provides real-time feedback from the Scanner’s integrated sensors:

Multi-Sensor Data: Real-time charts displaying:
- Gamma Ray Detector: Full spectrum radiation analysis for soil composition
- Optical Indices: NDVI, NDRE, EVI, SAVI, GNDVI, PRI, NCPI, MSAVI2, TCARI
- Optical Sensor: UV, Visible, and Near-IR wavelength data (410-940nm)
- Environmental Sensors: Temperature, humidity, and barometric pressure
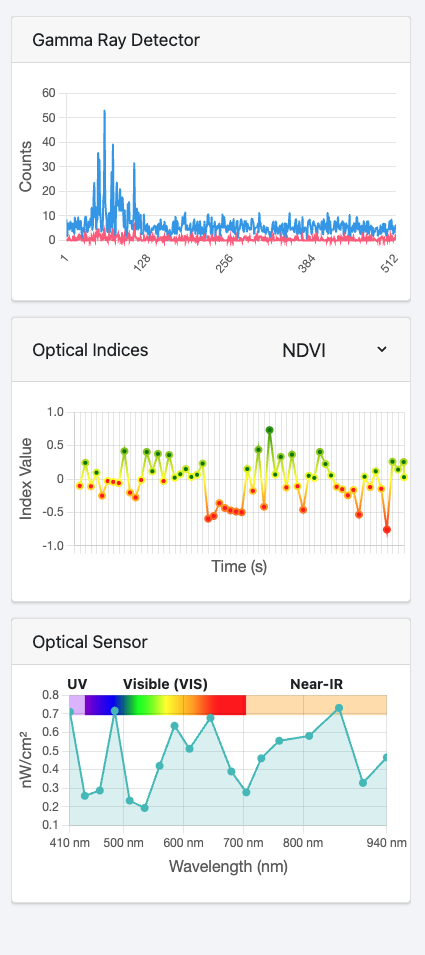
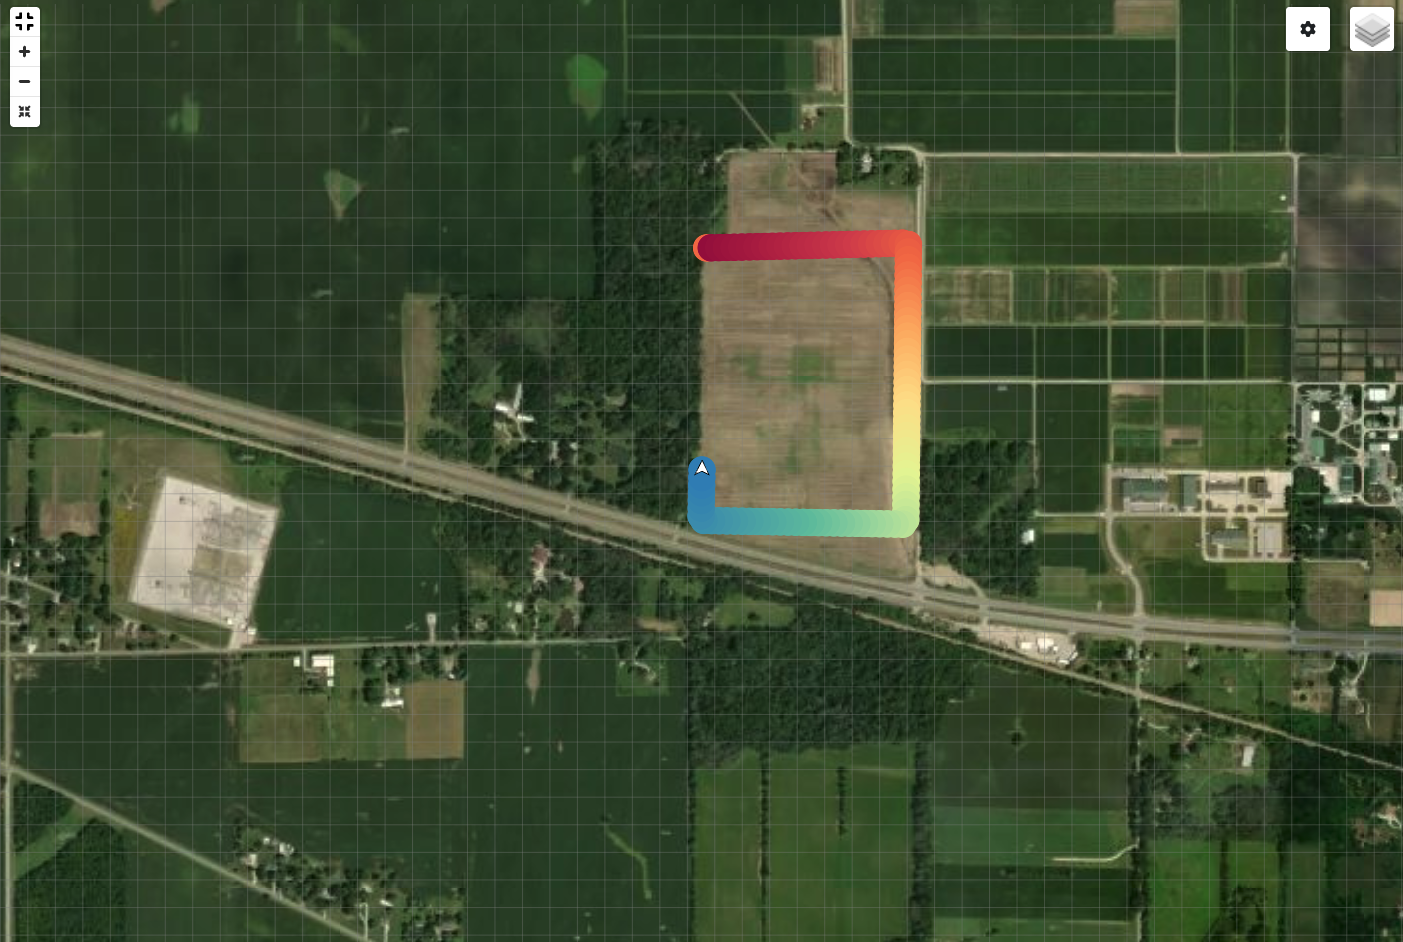
- Route Visualization: Colored data points showing scan coverage and soil data intensity
2.6 Stop Scanning
- When scanning is complete, click the red “Stop” button
- The system will:
- Save all collected data
- Exit fullscreen mode
- Show the completed scan data on the map
Phase 3: Download Scan Data
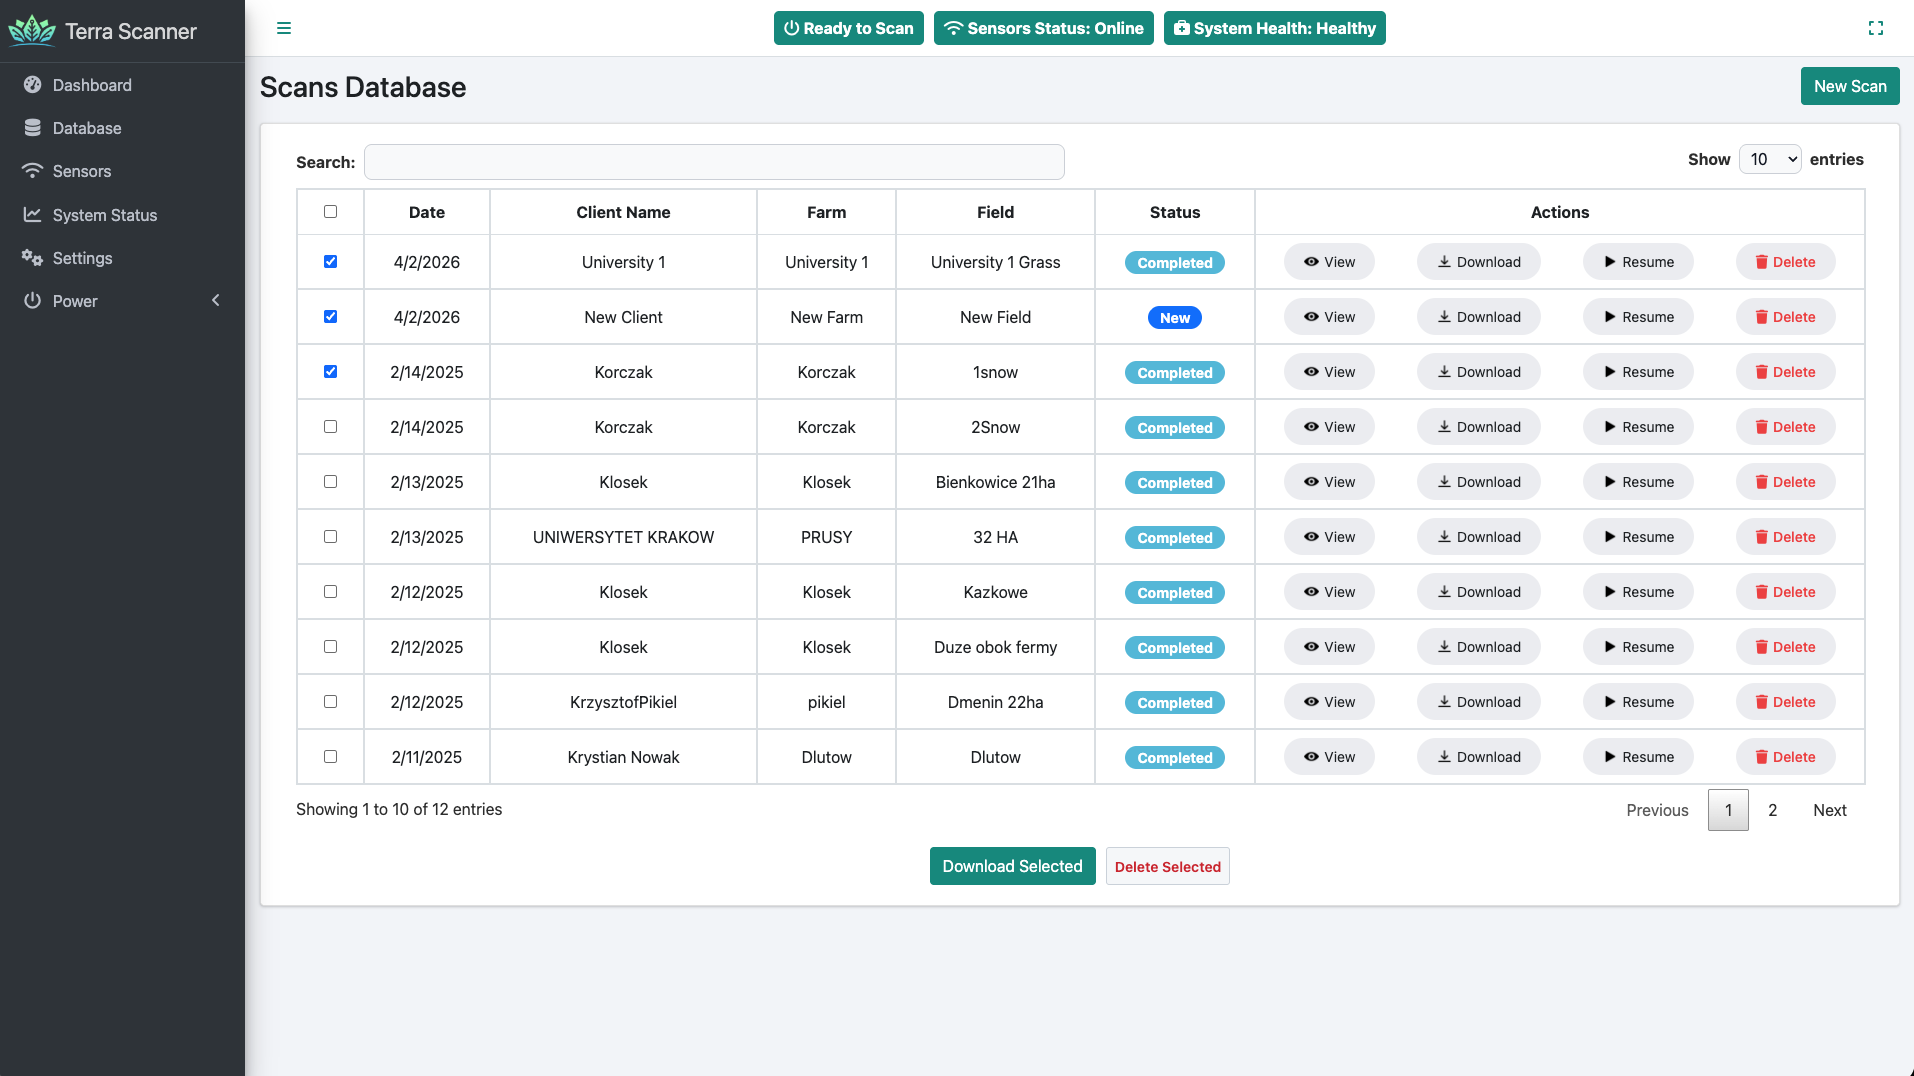
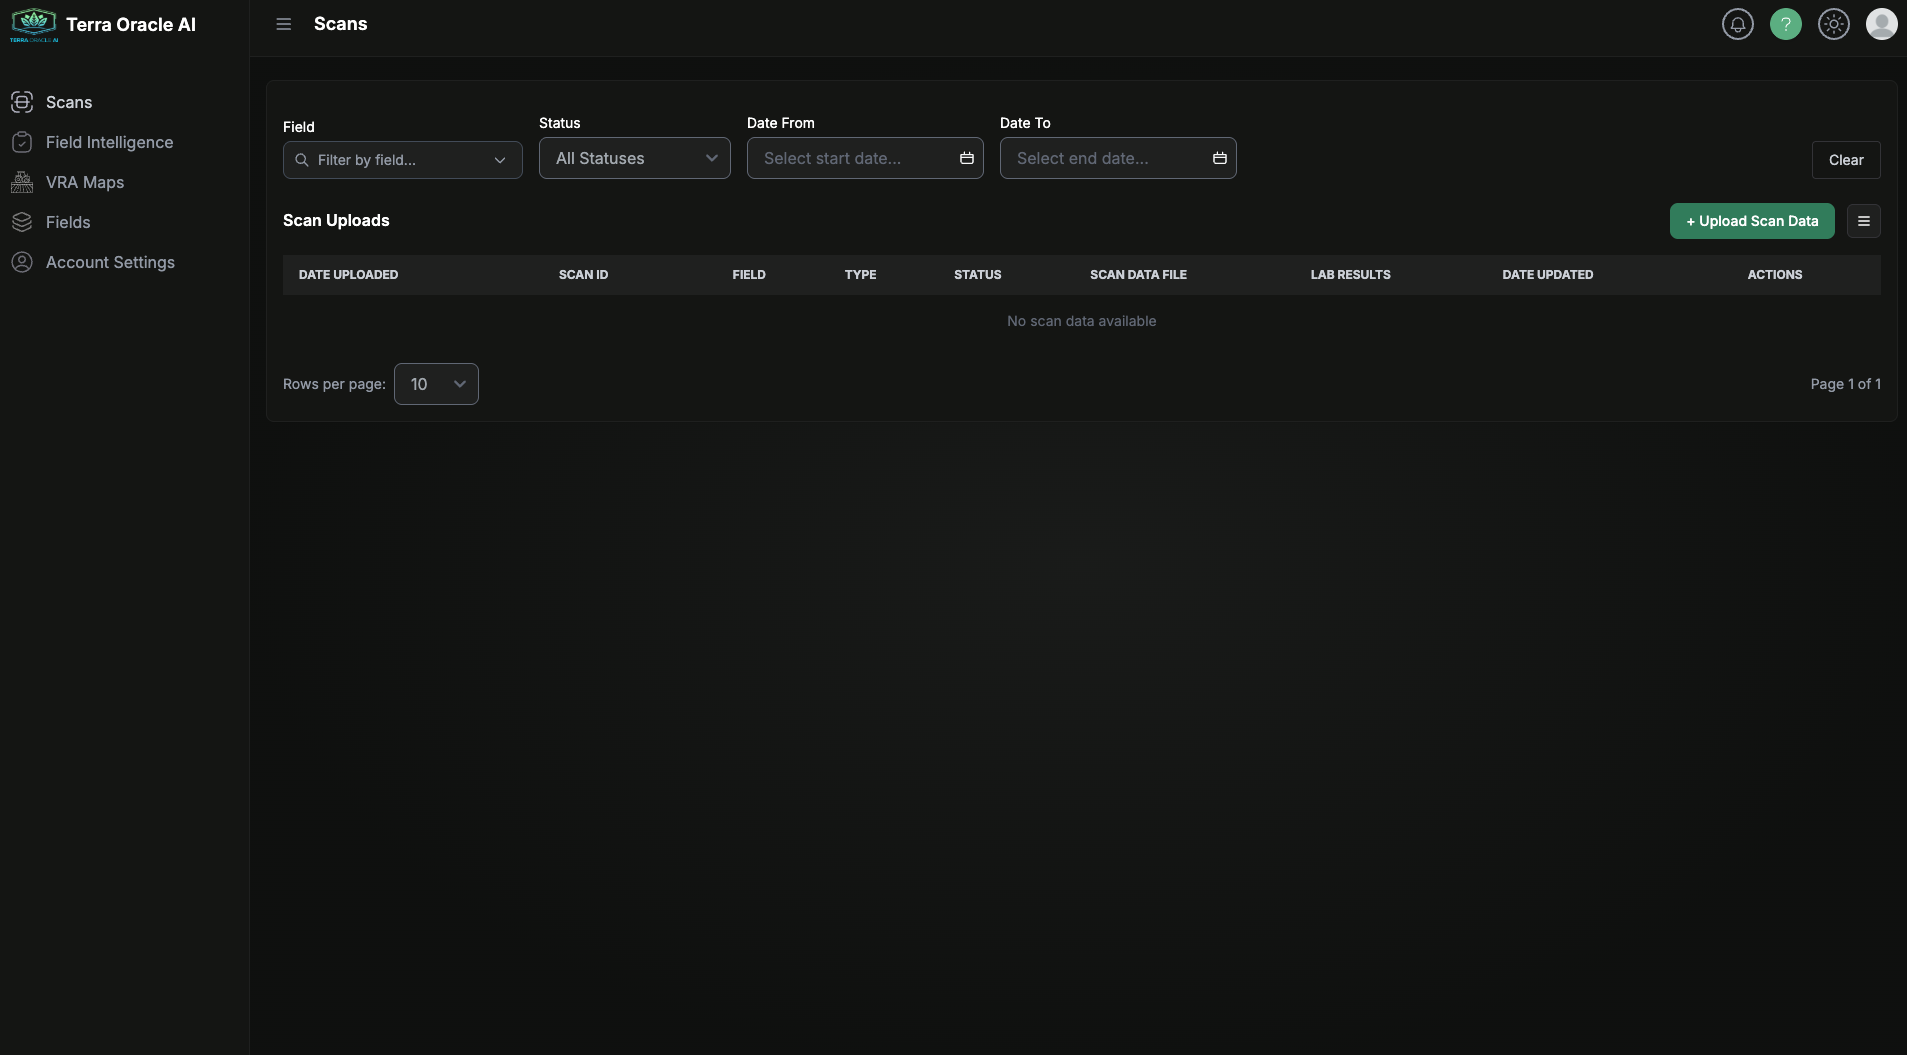
3.1 Via Database Page
- Navigate to Database in the sidebar
- Find your completed scan in the table
- Options for data download:
- Single scan: Click the “Download” button for a specific scan
- Multiple scans:
- Check the boxes next to desired scans
- Click “Download Selected” button
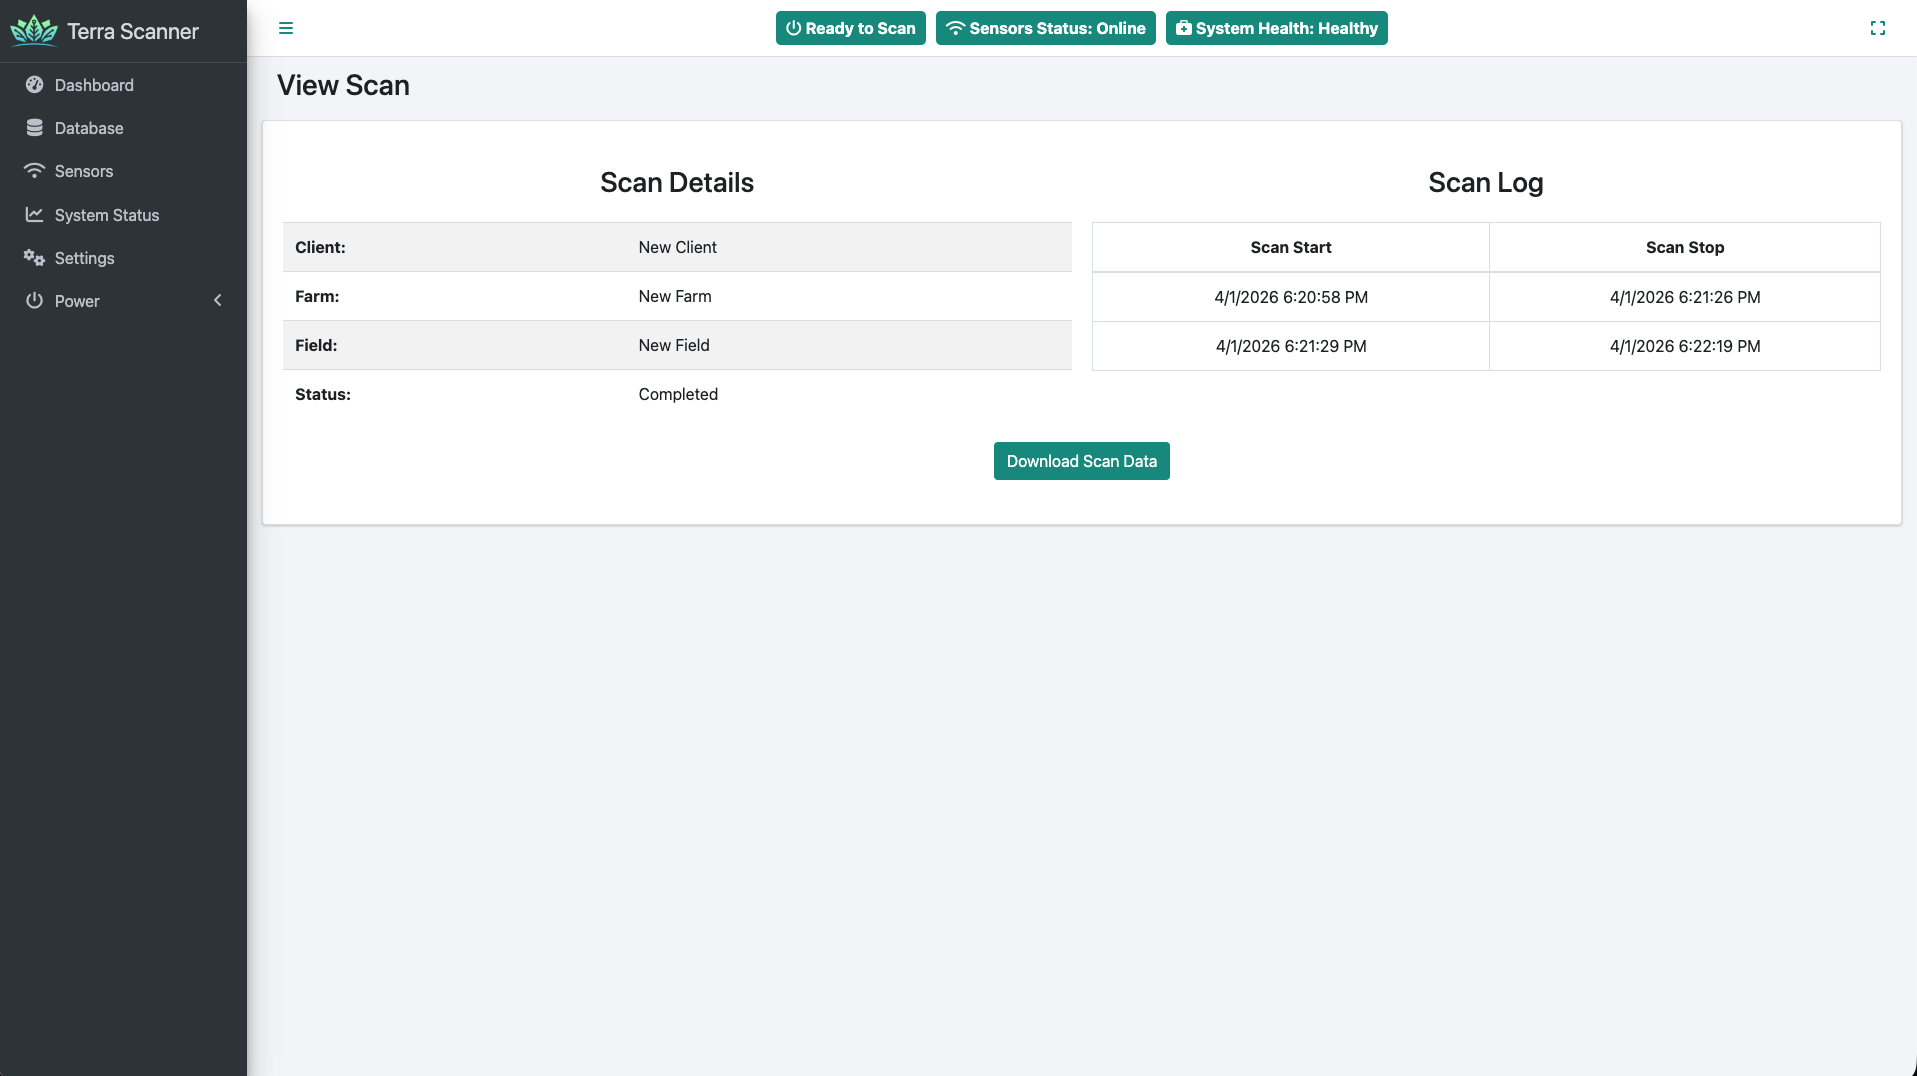
3.2 Via View Scan Page
- From the Database page, click “View” for any scan
- Review scan details including:
- Client/Farm/Field information
- Scan start/stop times
- Current status
- Click “Download Scan Data” button
3.3 Via Dashboard (Recent Scans)
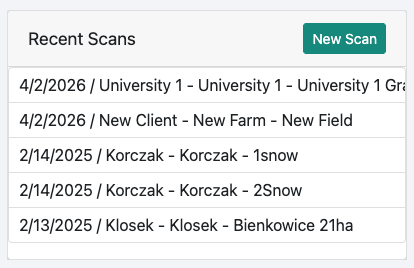
- In the Dashboard’s Recent Scans widget
- Hover over any scan to reveal action buttons
- Click the “Download” button
Phase 4: Upload to Terra Oracle AI Portal
4.1 Access the Portal
- Navigate to the Terra Oracle AI Portal (web-based interface)
- Log in to your Terra Oracle AI account
- Select the appropriate project or field location
4.2 Upload Scan Data
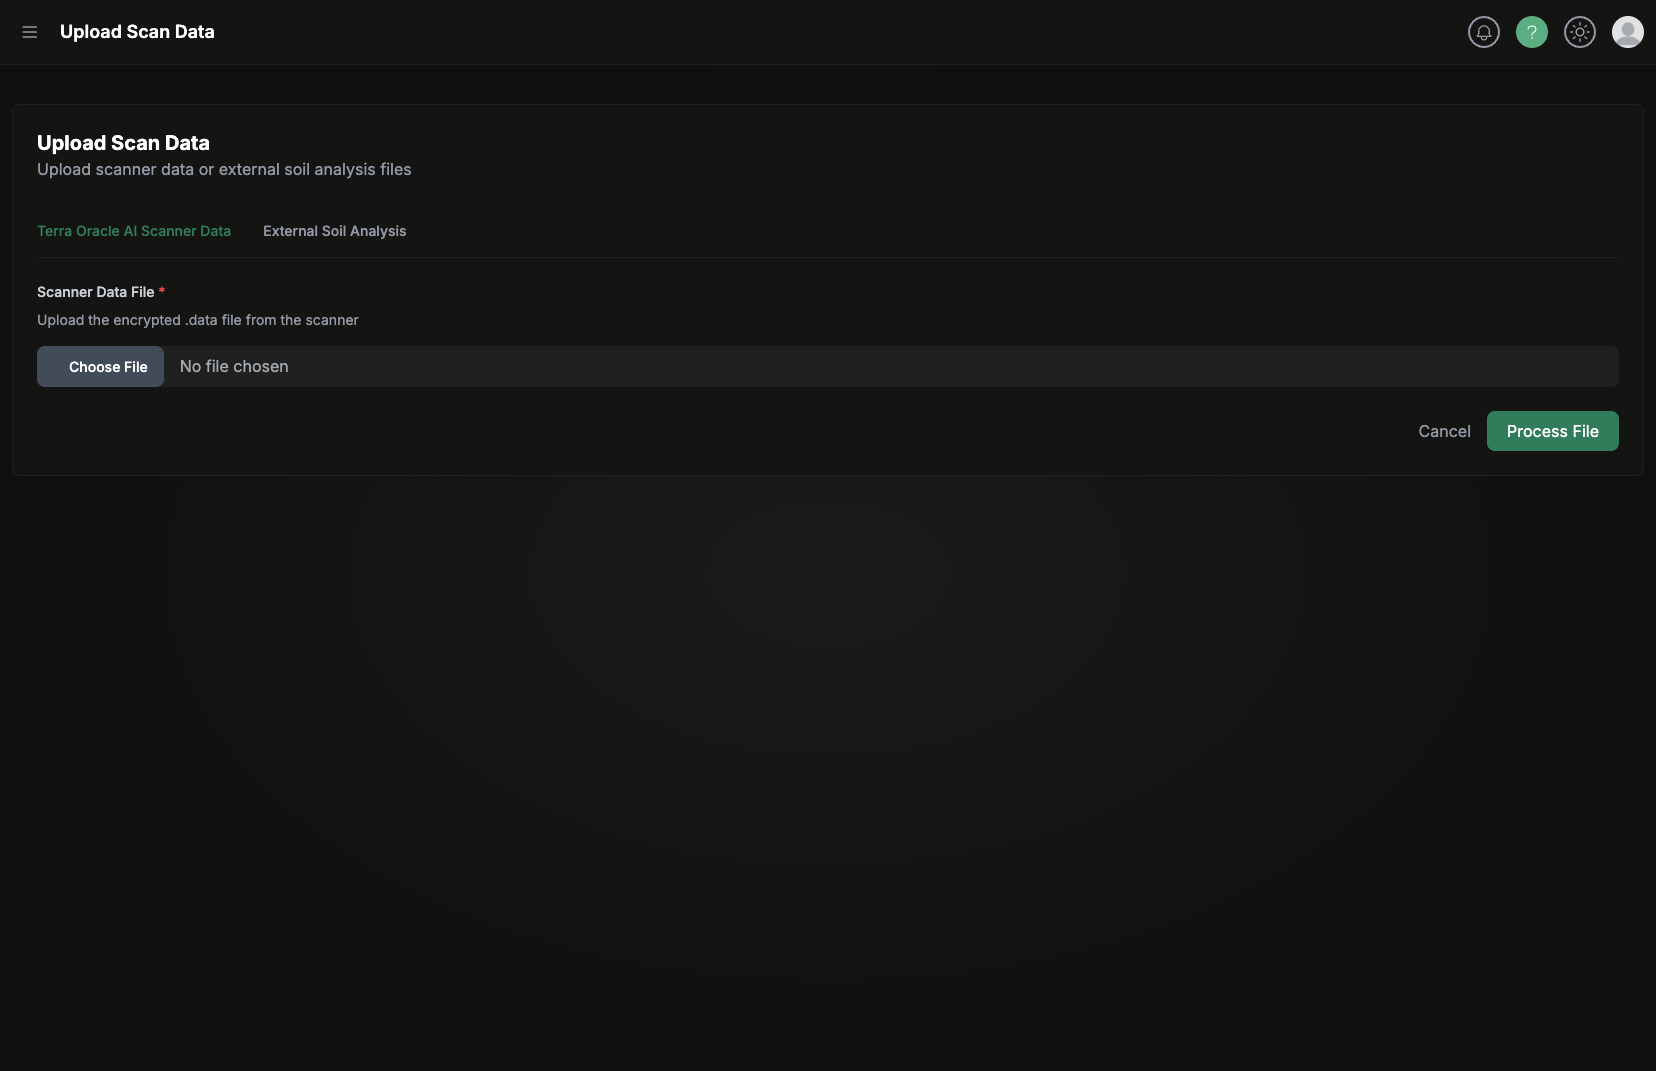
- Upload Files: Use the portal’s upload interface to submit your downloaded scan data
- Add Calibration Data: If you have soil samples, upload the corresponding laboratory analysis results
- Verify Upload: Confirm all scan data has been successfully transferred
4.3 AI Processing and Results

The Terra Oracle AI system will:
- Process Data: Advanced AI engine analyzes the multi-sensor data including gamma radiation spectrum, optical data, and environmental parameters
- Generate Insights: Create comprehensive soil analysis reports with actionable agronomic recommendations
- Create VRA Maps: Generate Variable Rate Application maps for precise fertilizer application
- Integration: Automatically transfer results to John Deere Operations Center (if configured)
Detailed Feature Guide
Dashboard Features
Map Controls
- Zoom: Use mouse wheel or navigation controls
- Fullscreen: Button in top-right corner or automatic during scanning
- Layer Selection: Choose between Satellite, OpenStreetMap, or None
- Grid Toggle: Show/hide navigation grid
- Route Toggle: Show/hide scan data visualization

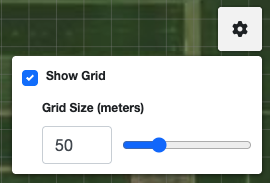
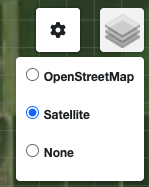
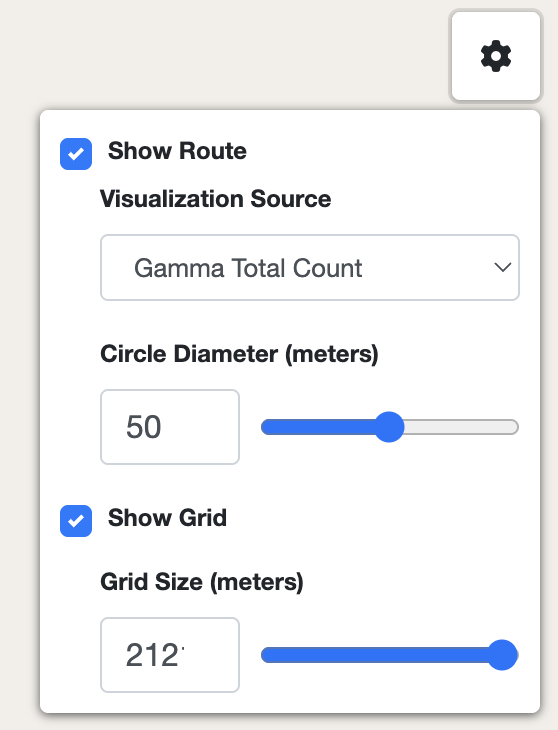
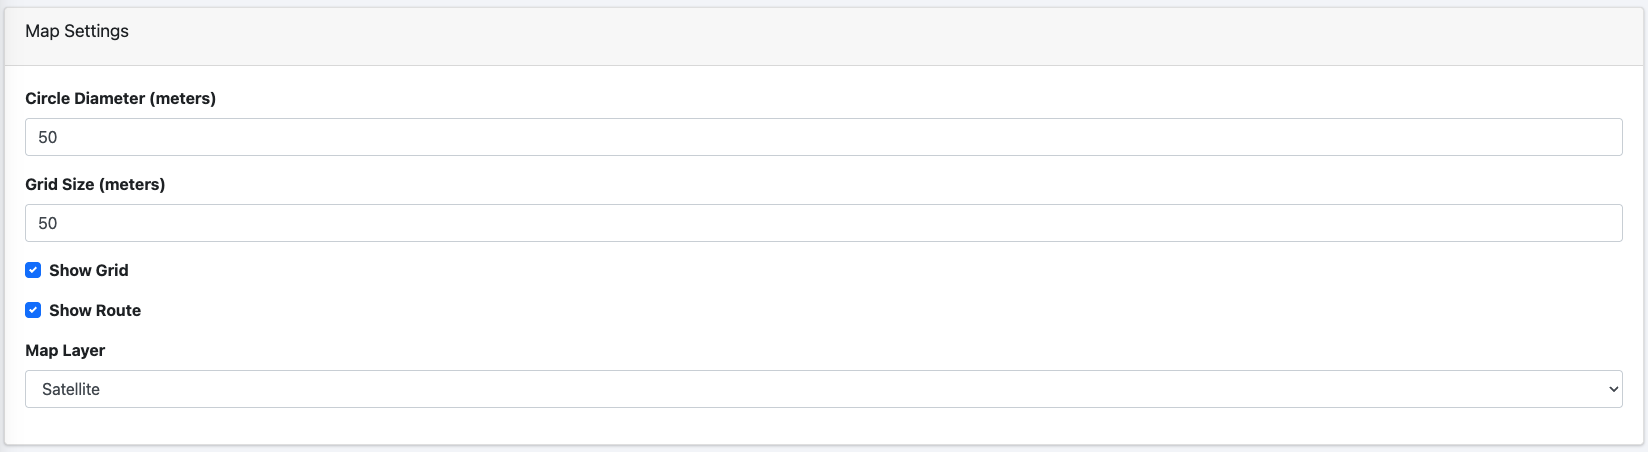
Map Settings Panel
Access via the gear icon in the top-right:
- Visualization Source: Choose data type to display (NDVI, Gamma, etc.)
- Circle Diameter: Adjust size of data point visualization (1-100 meters)
- Grid Size: Modify navigation grid spacing
- Show Route/Grid: Toggle visibility options
Real-time Charts
The Scanner’s integrated sensors provide continuous data streams:
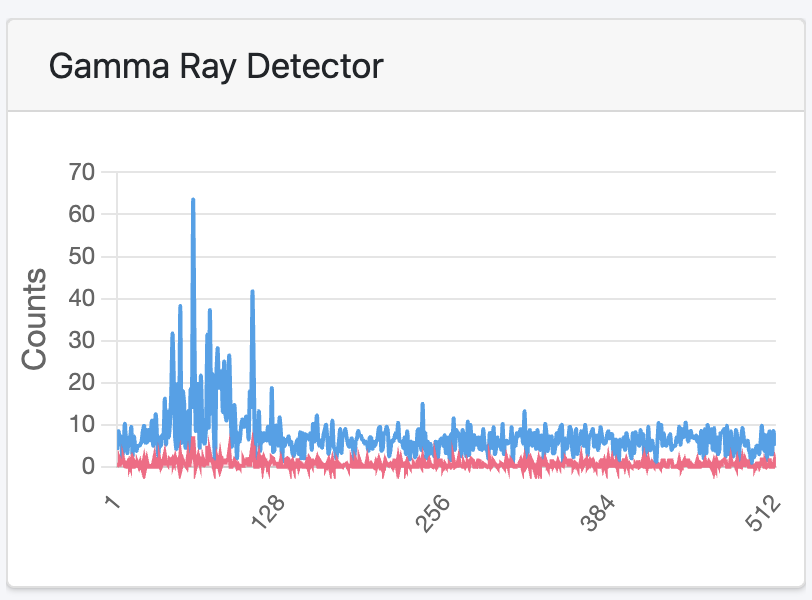
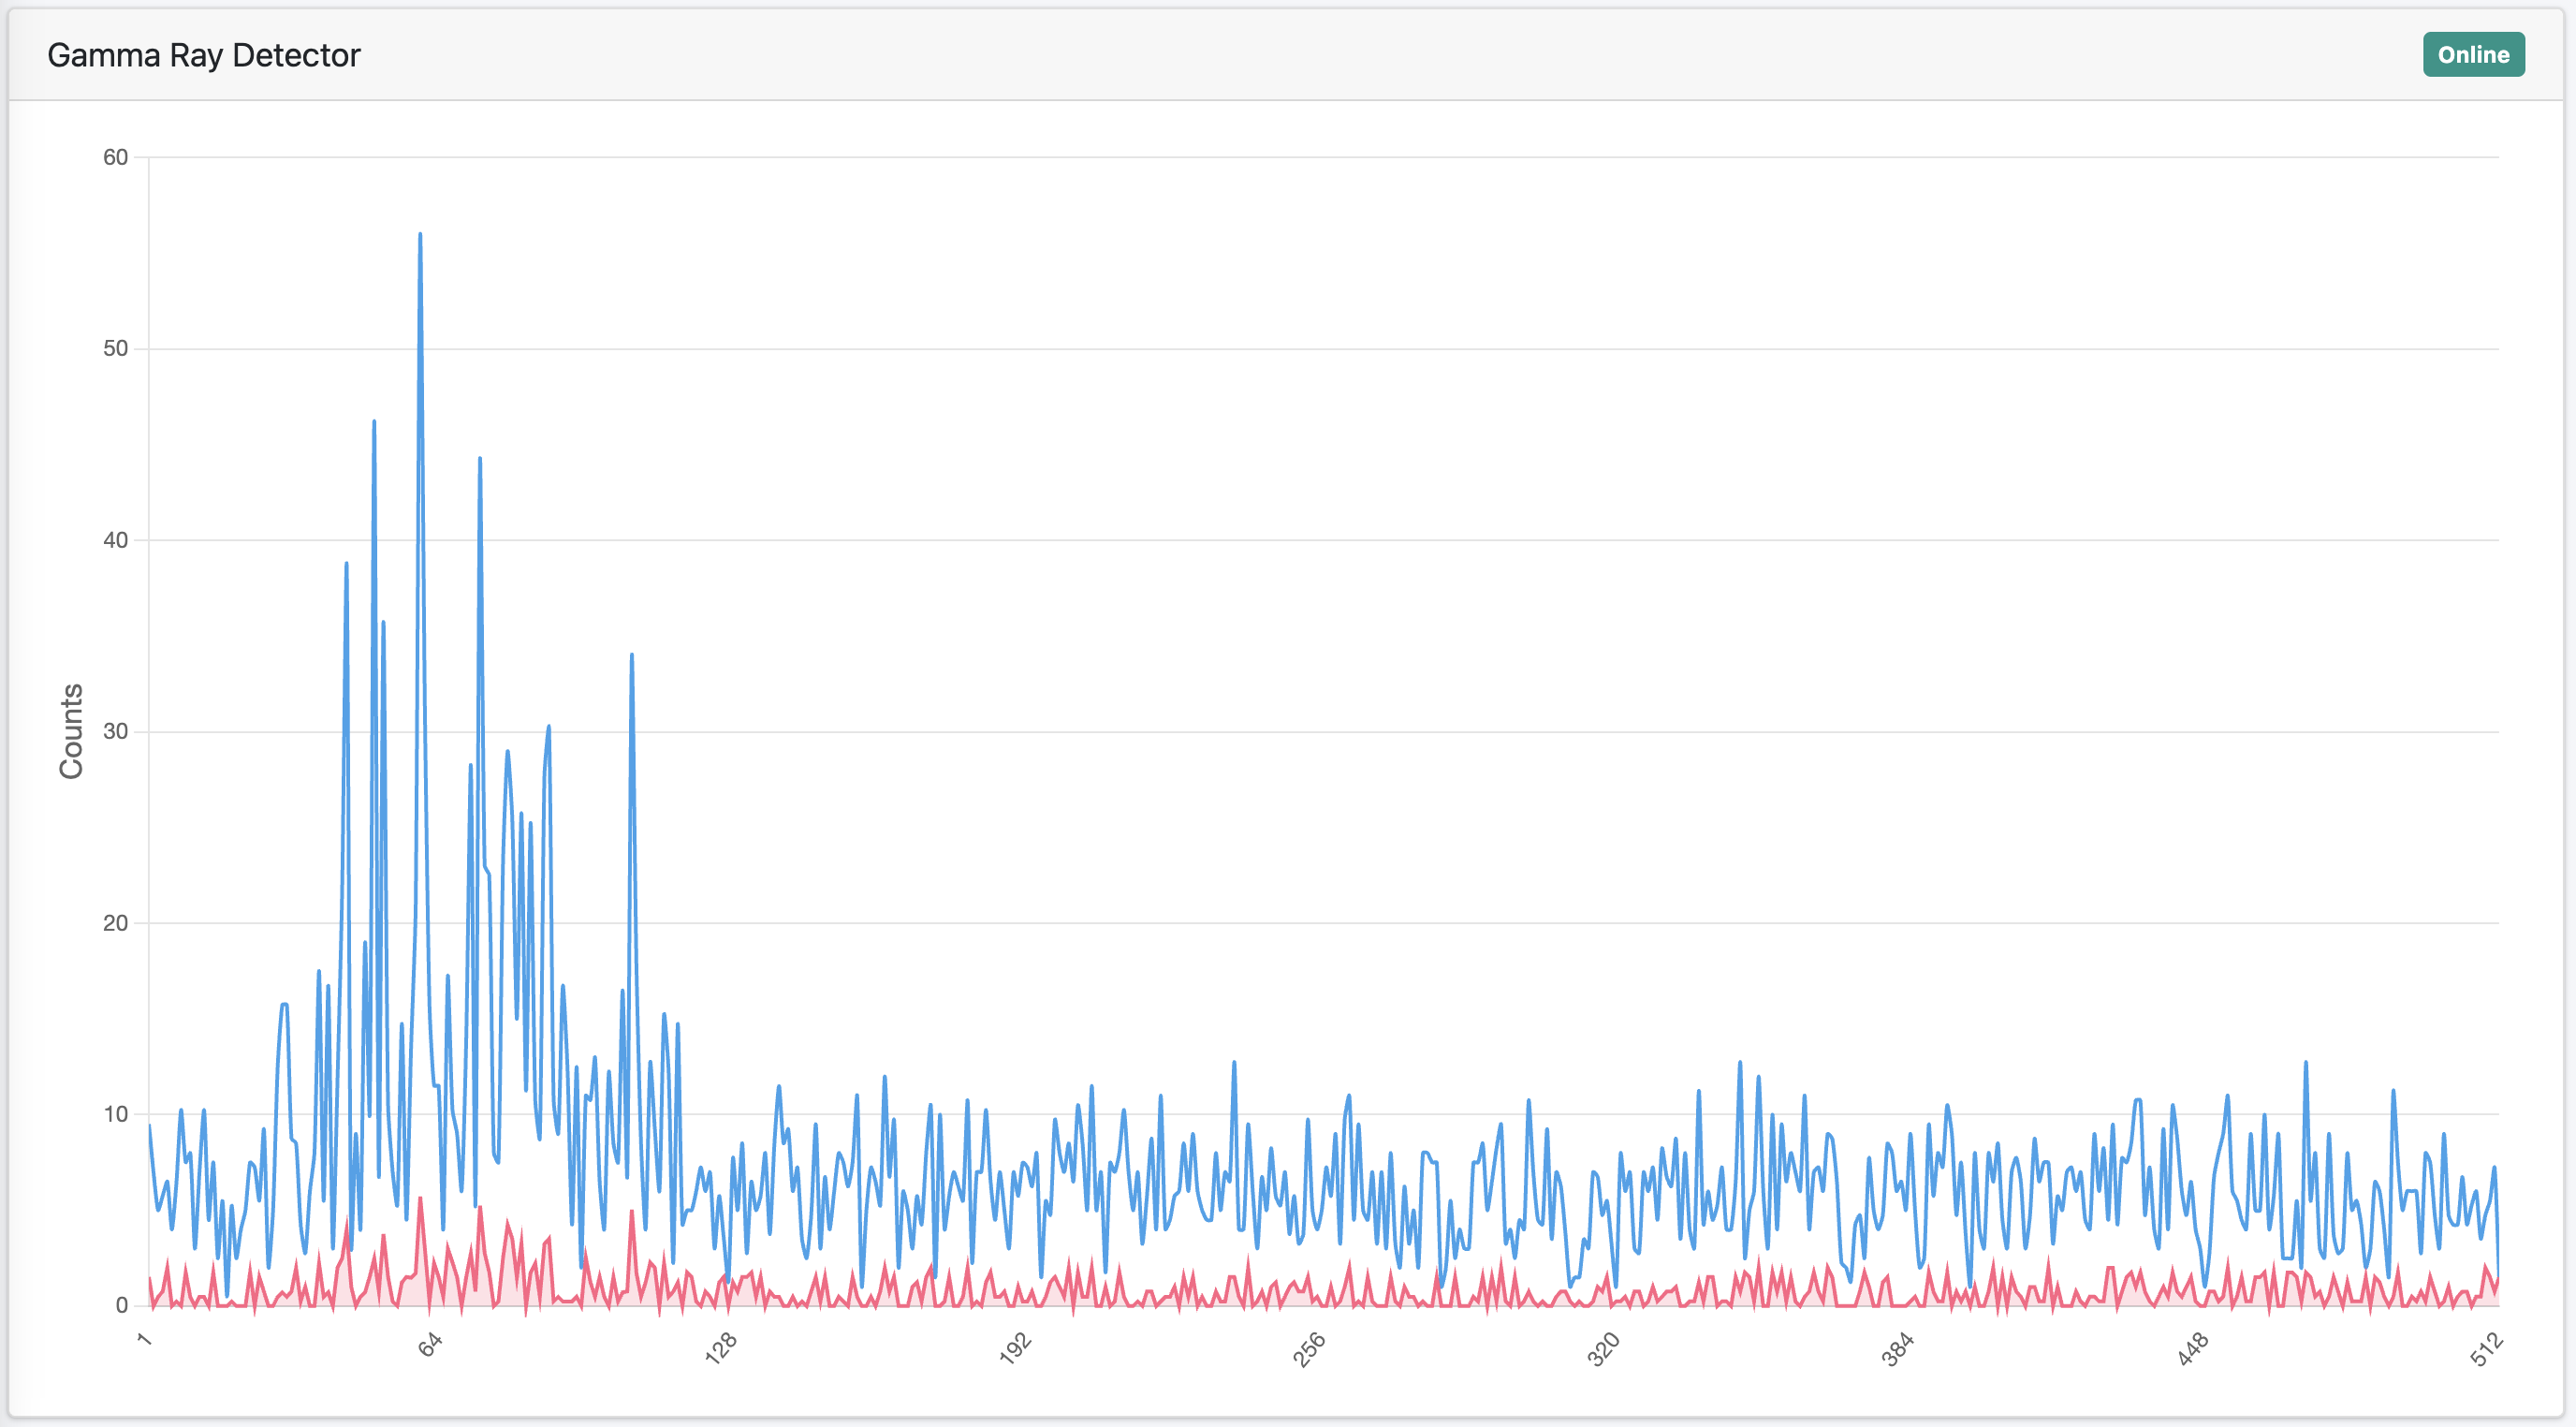
Gamma Ray Detector
- Current and summed radiation counts for soil composition analysis
- Full spectrum channel-by-channel analysis
- Critical for detecting soil minerals and nutrients
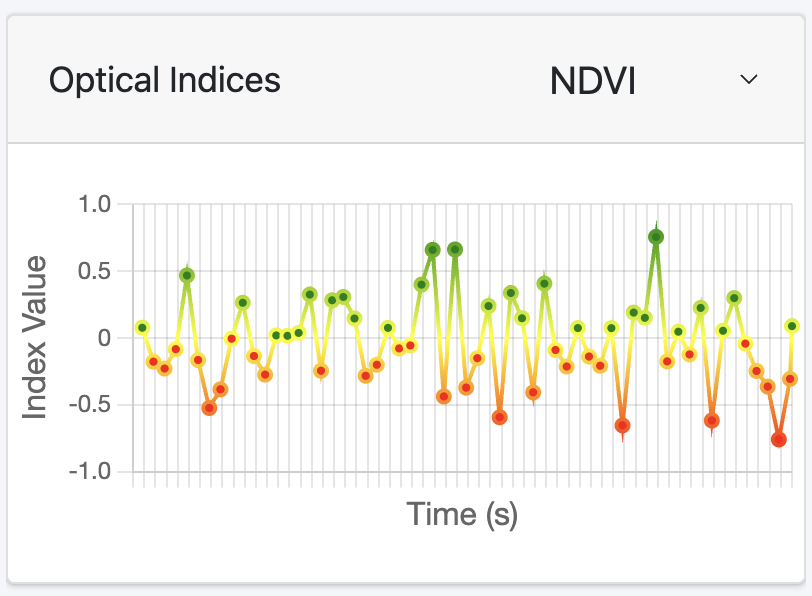
Optical Indices
- Selectable vegetation indices: NDVI, NDRE, EVI, SAVI, GNDVI, PRI, NCPI, MSAVI2, TCARI
- Real-time value tracking over time for crop health assessment
- Color-coded visualization for immediate field insights
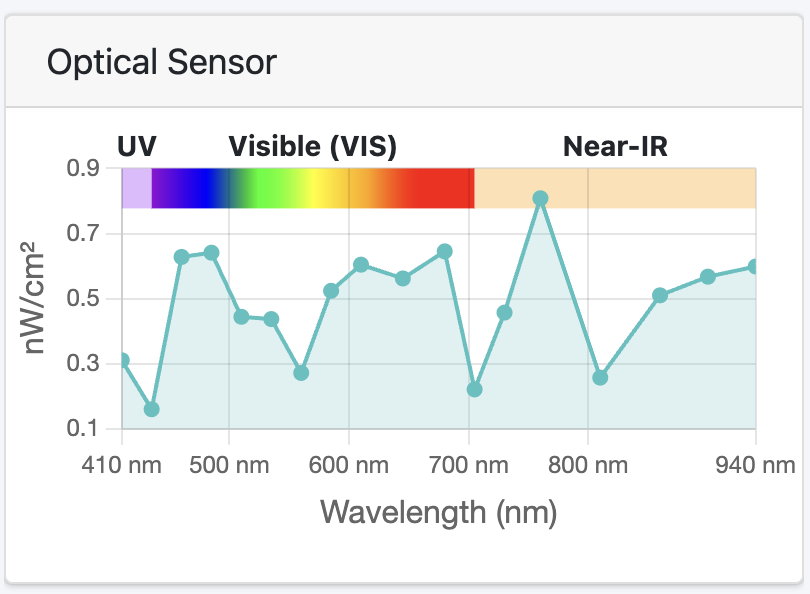
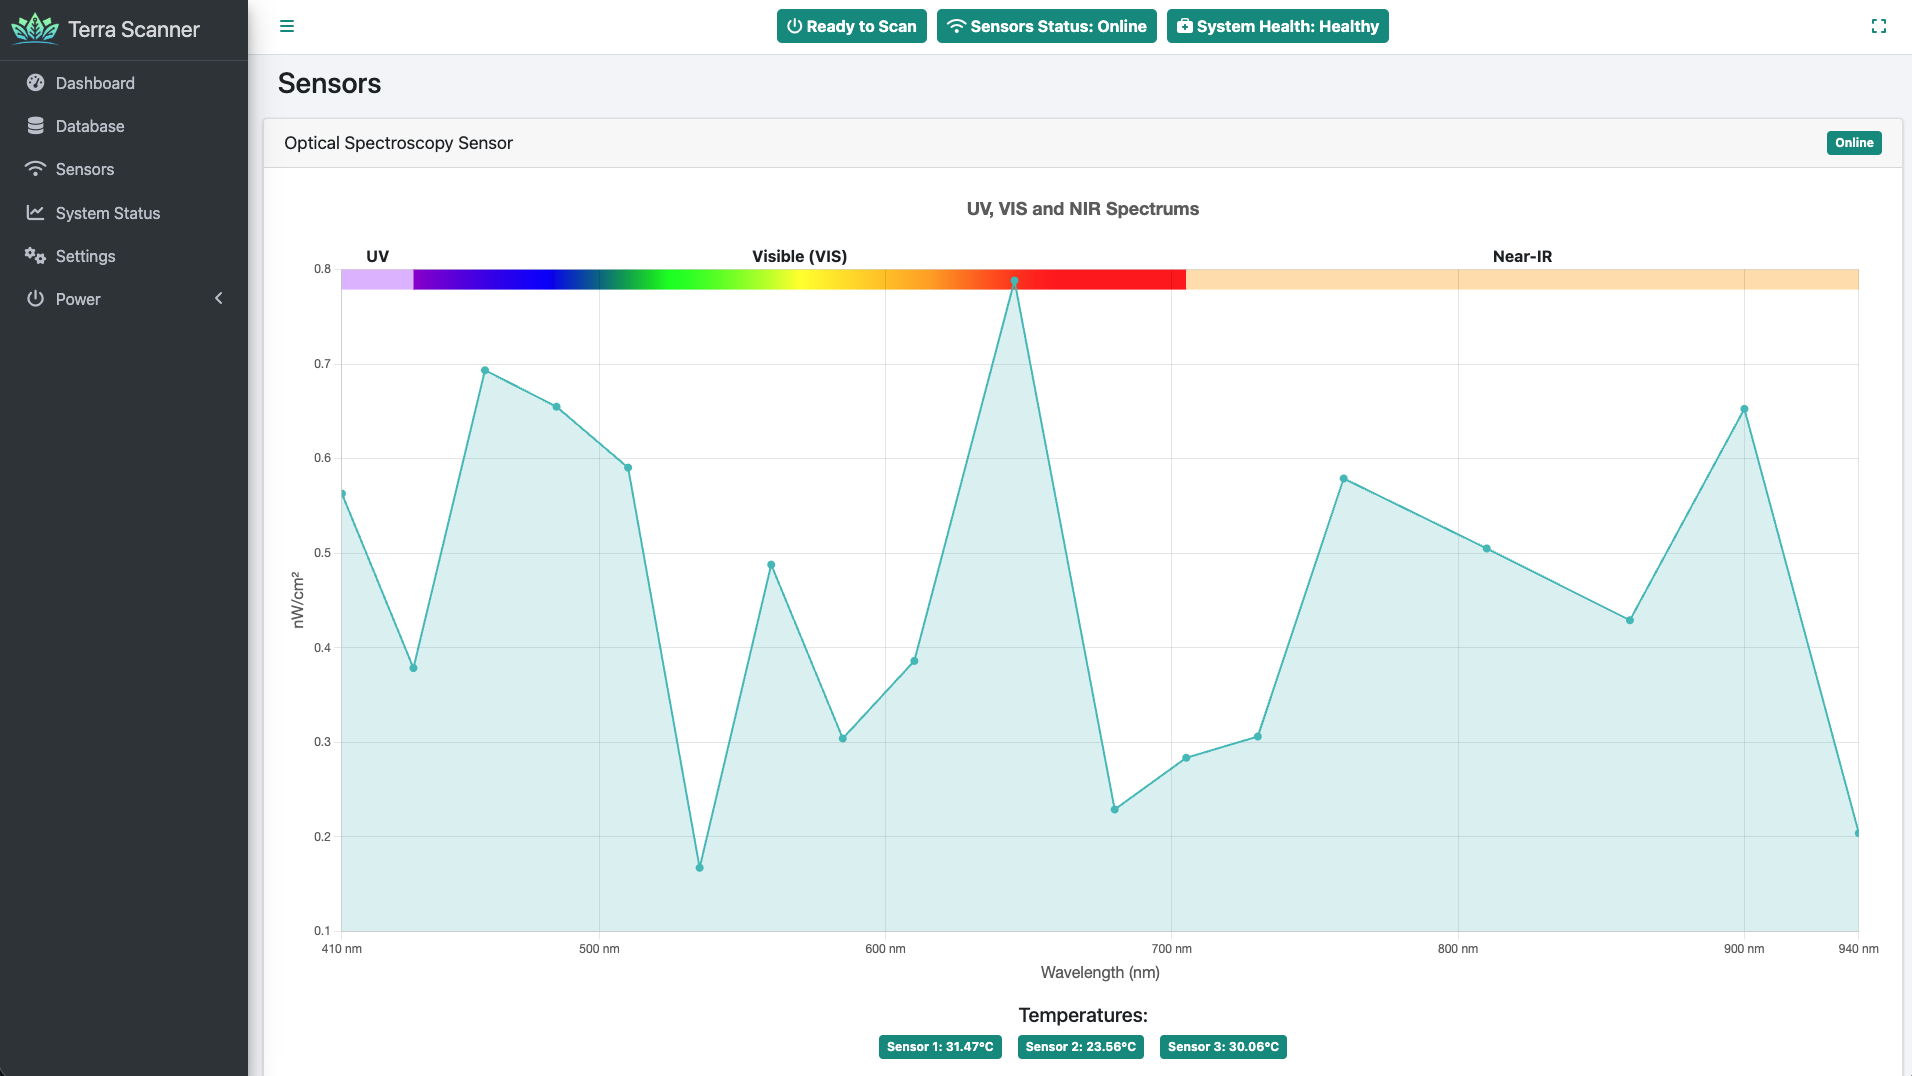
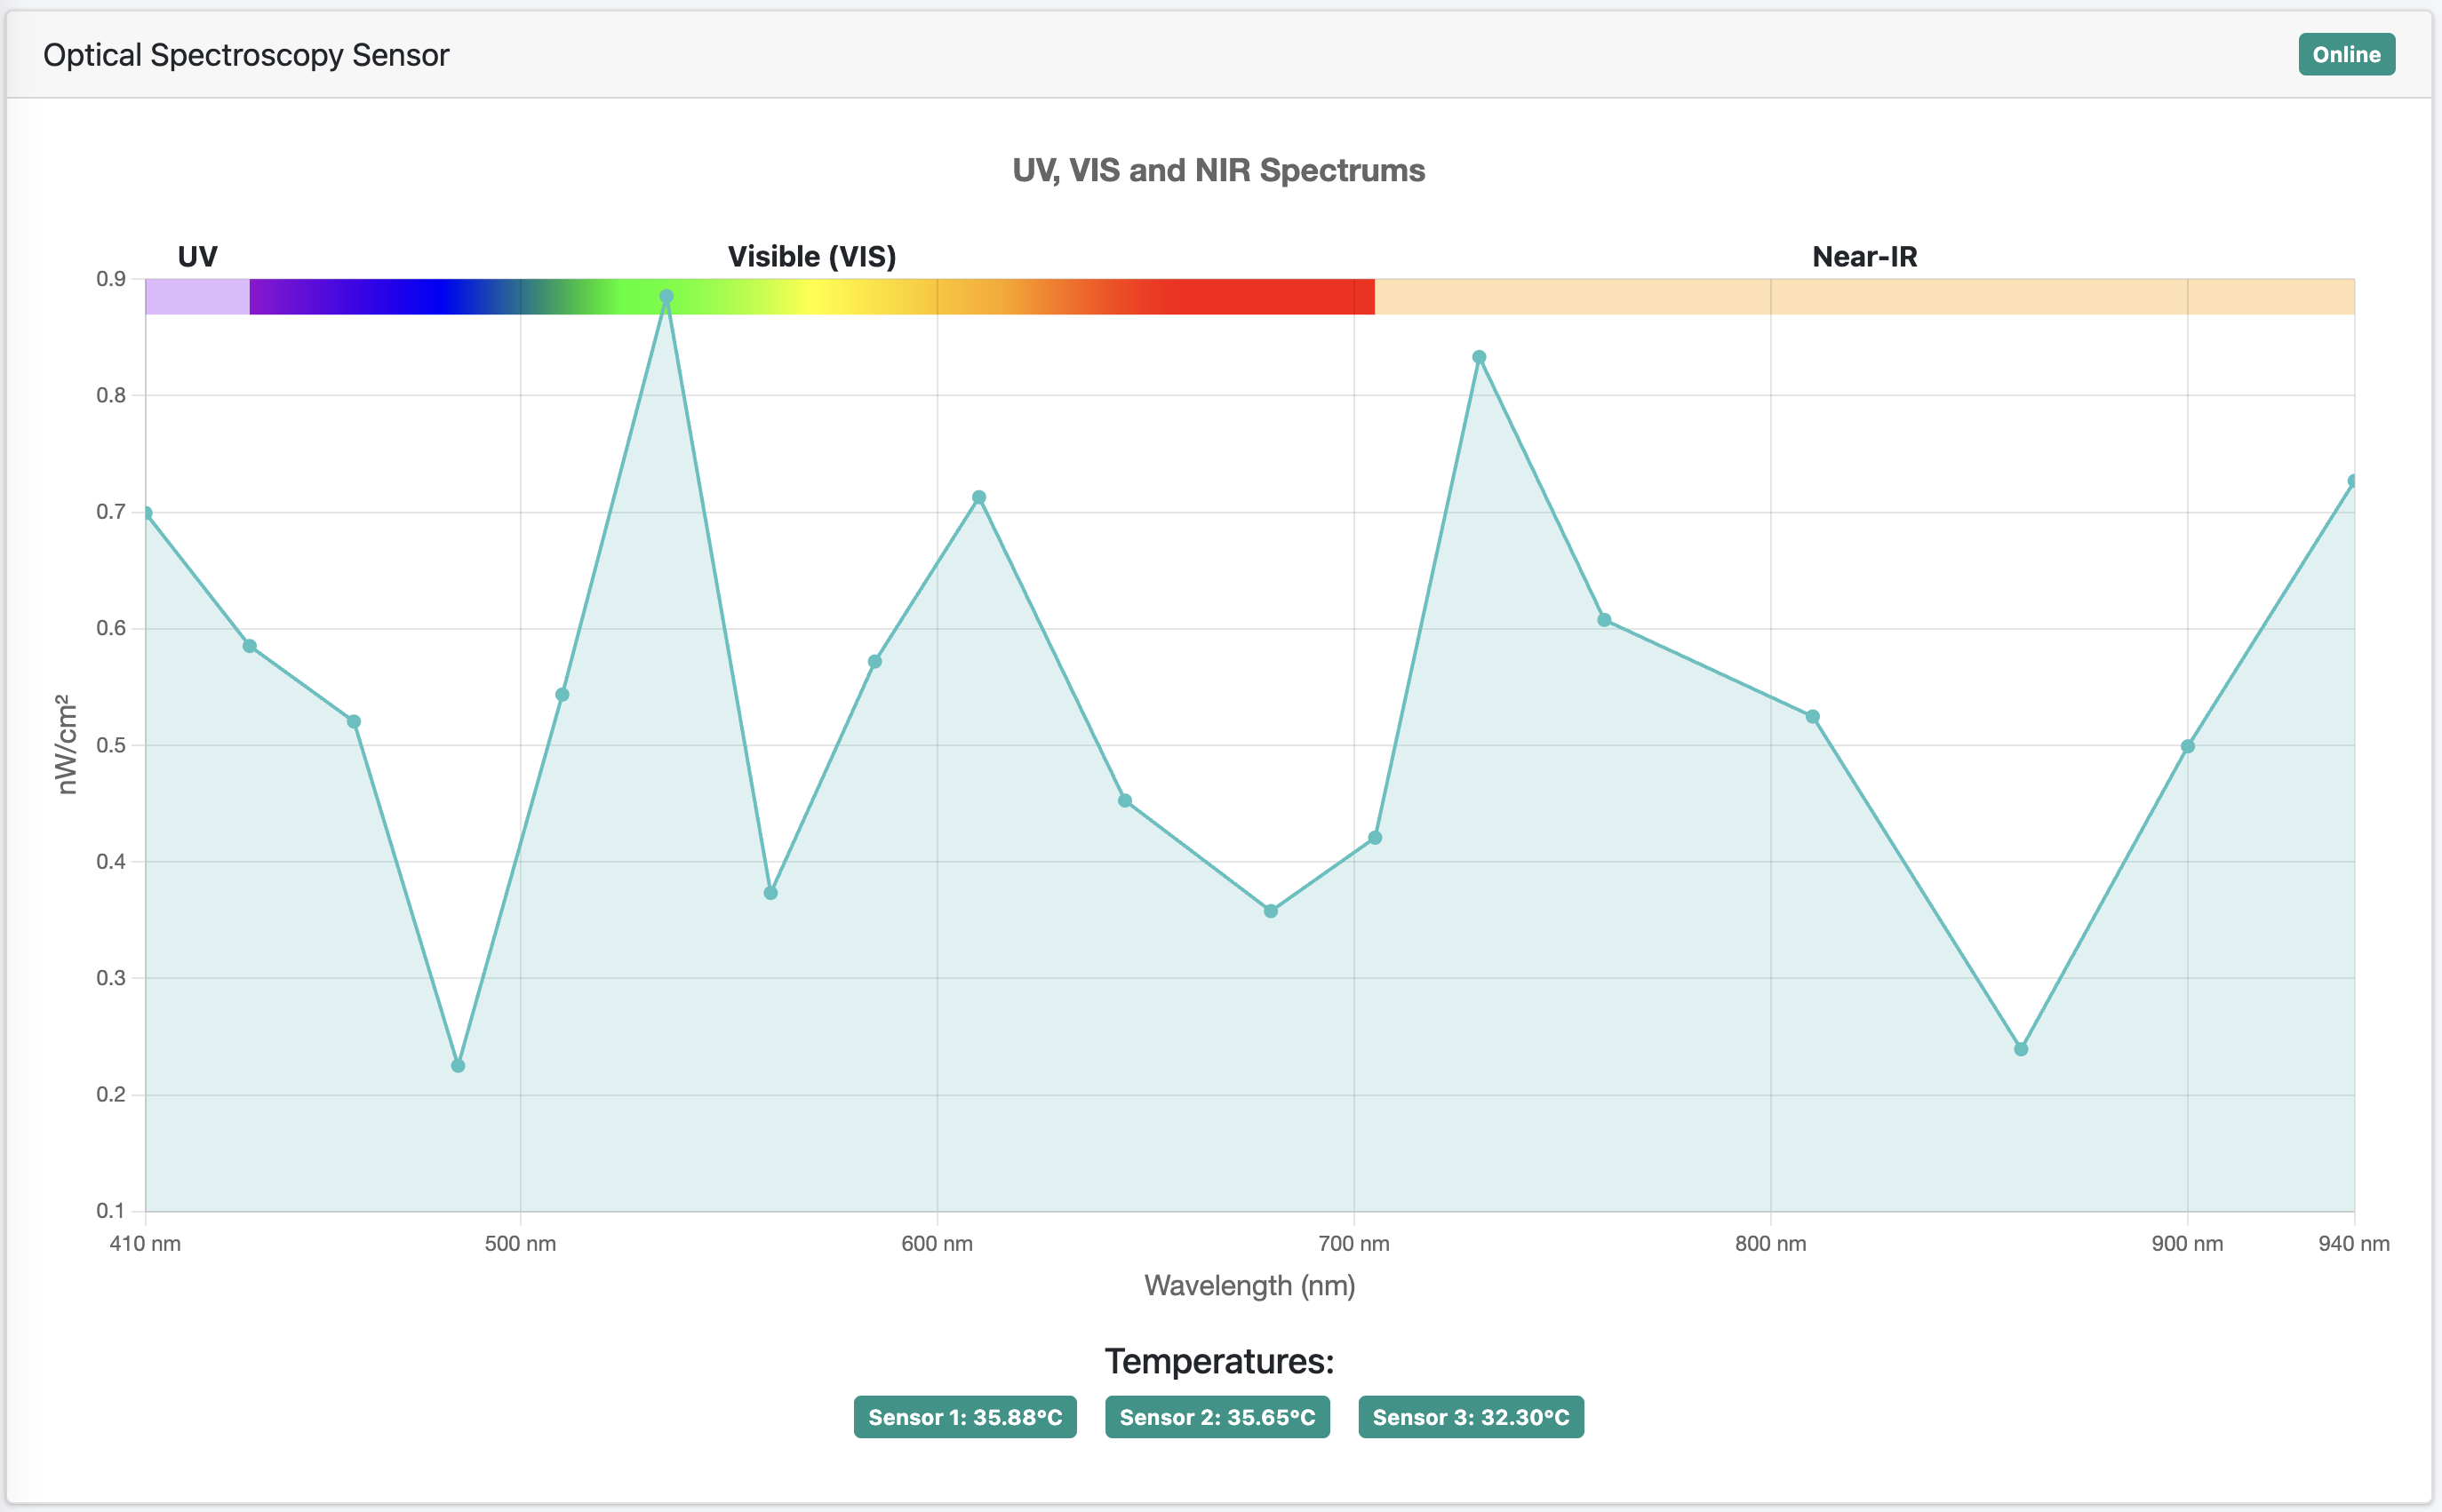
Optical Sensor
- Full wavelength spectrum (410-940nm) from the Scanner’s optical sensors
- UV, Visible, and Near-IR regions clearly marked with spectral gradients
- Three integrated temperature sensors for calibration accuracy
- Real-time spectroscopic analysis for soil properties
Database Management
Scan Operations
- View: Detailed scan information and timeline
- Download: Export scan data files
- Resume: Continue a previously paused scan
- Delete: Remove scans (with confirmation)
Batch Operations
- Select All: Choose multiple scans at once
- Download Selected: Bulk data export
- Delete Selected: Bulk removal (with confirmation)
Search and Filter
- Built-in search functionality
- Sortable columns
- Date range filtering
Sensors Page
Individual sensor monitoring for:
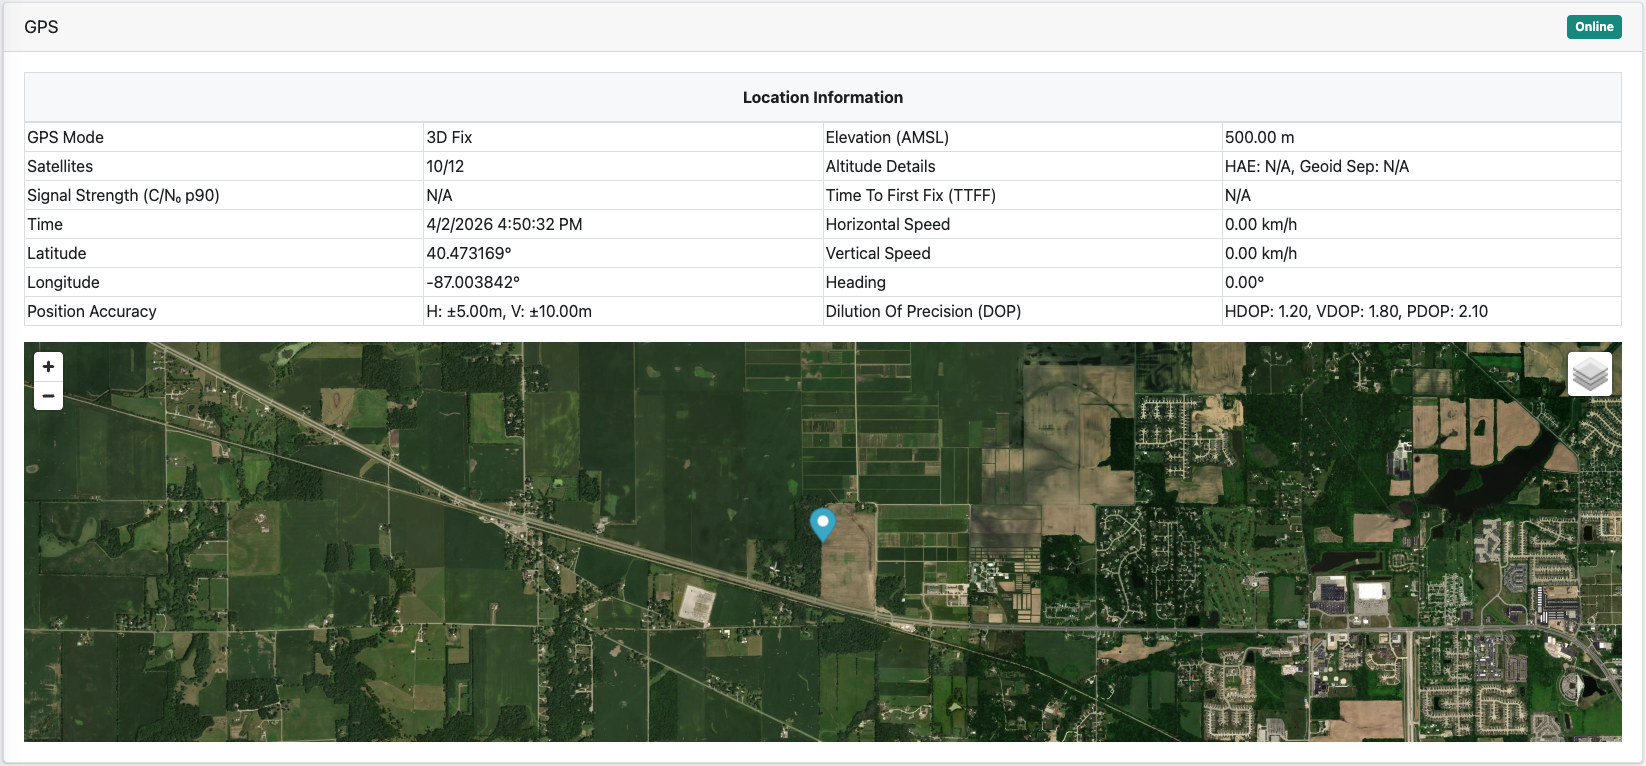
GPS Sensor (Integrated in Scanner)
- Real-time Location: High-precision Lat/Long coordinates from the Scanner’s built-in GPS
- Navigation Data: Vehicle speed, heading, elevation tracking
- Satellite Information: 3D/2D fix status, satellite count, HDOP/VDOP/PDOP accuracy
- Live Map: Current Scanner position with selectable base layers (Satellite/OpenStreetMap)
Optical Sensor (Scanner Hardware)
- Multi-Spectral Analysis: Real-time wavelength readings across UV, Visible, and Near-IR spectrum
- Temperature Monitoring: Three integrated sensor temperature readings for calibration
- Vegetation Indices: Live NDVI and other optical index calculations
- Environmental Integration: Combined with barometric pressure and humidity data
Gamma Ray Detector (Scanner Hardware)
- Full Spectrum Analysis: Multi-channel radiation detection for soil composition
- Count Rates: Current and accumulated radiation readings
- Soil Mineral Detection: Advanced gamma spectroscopy for nutrient analysis
- Real-time Processing: Immediate feedback during field scanning operations
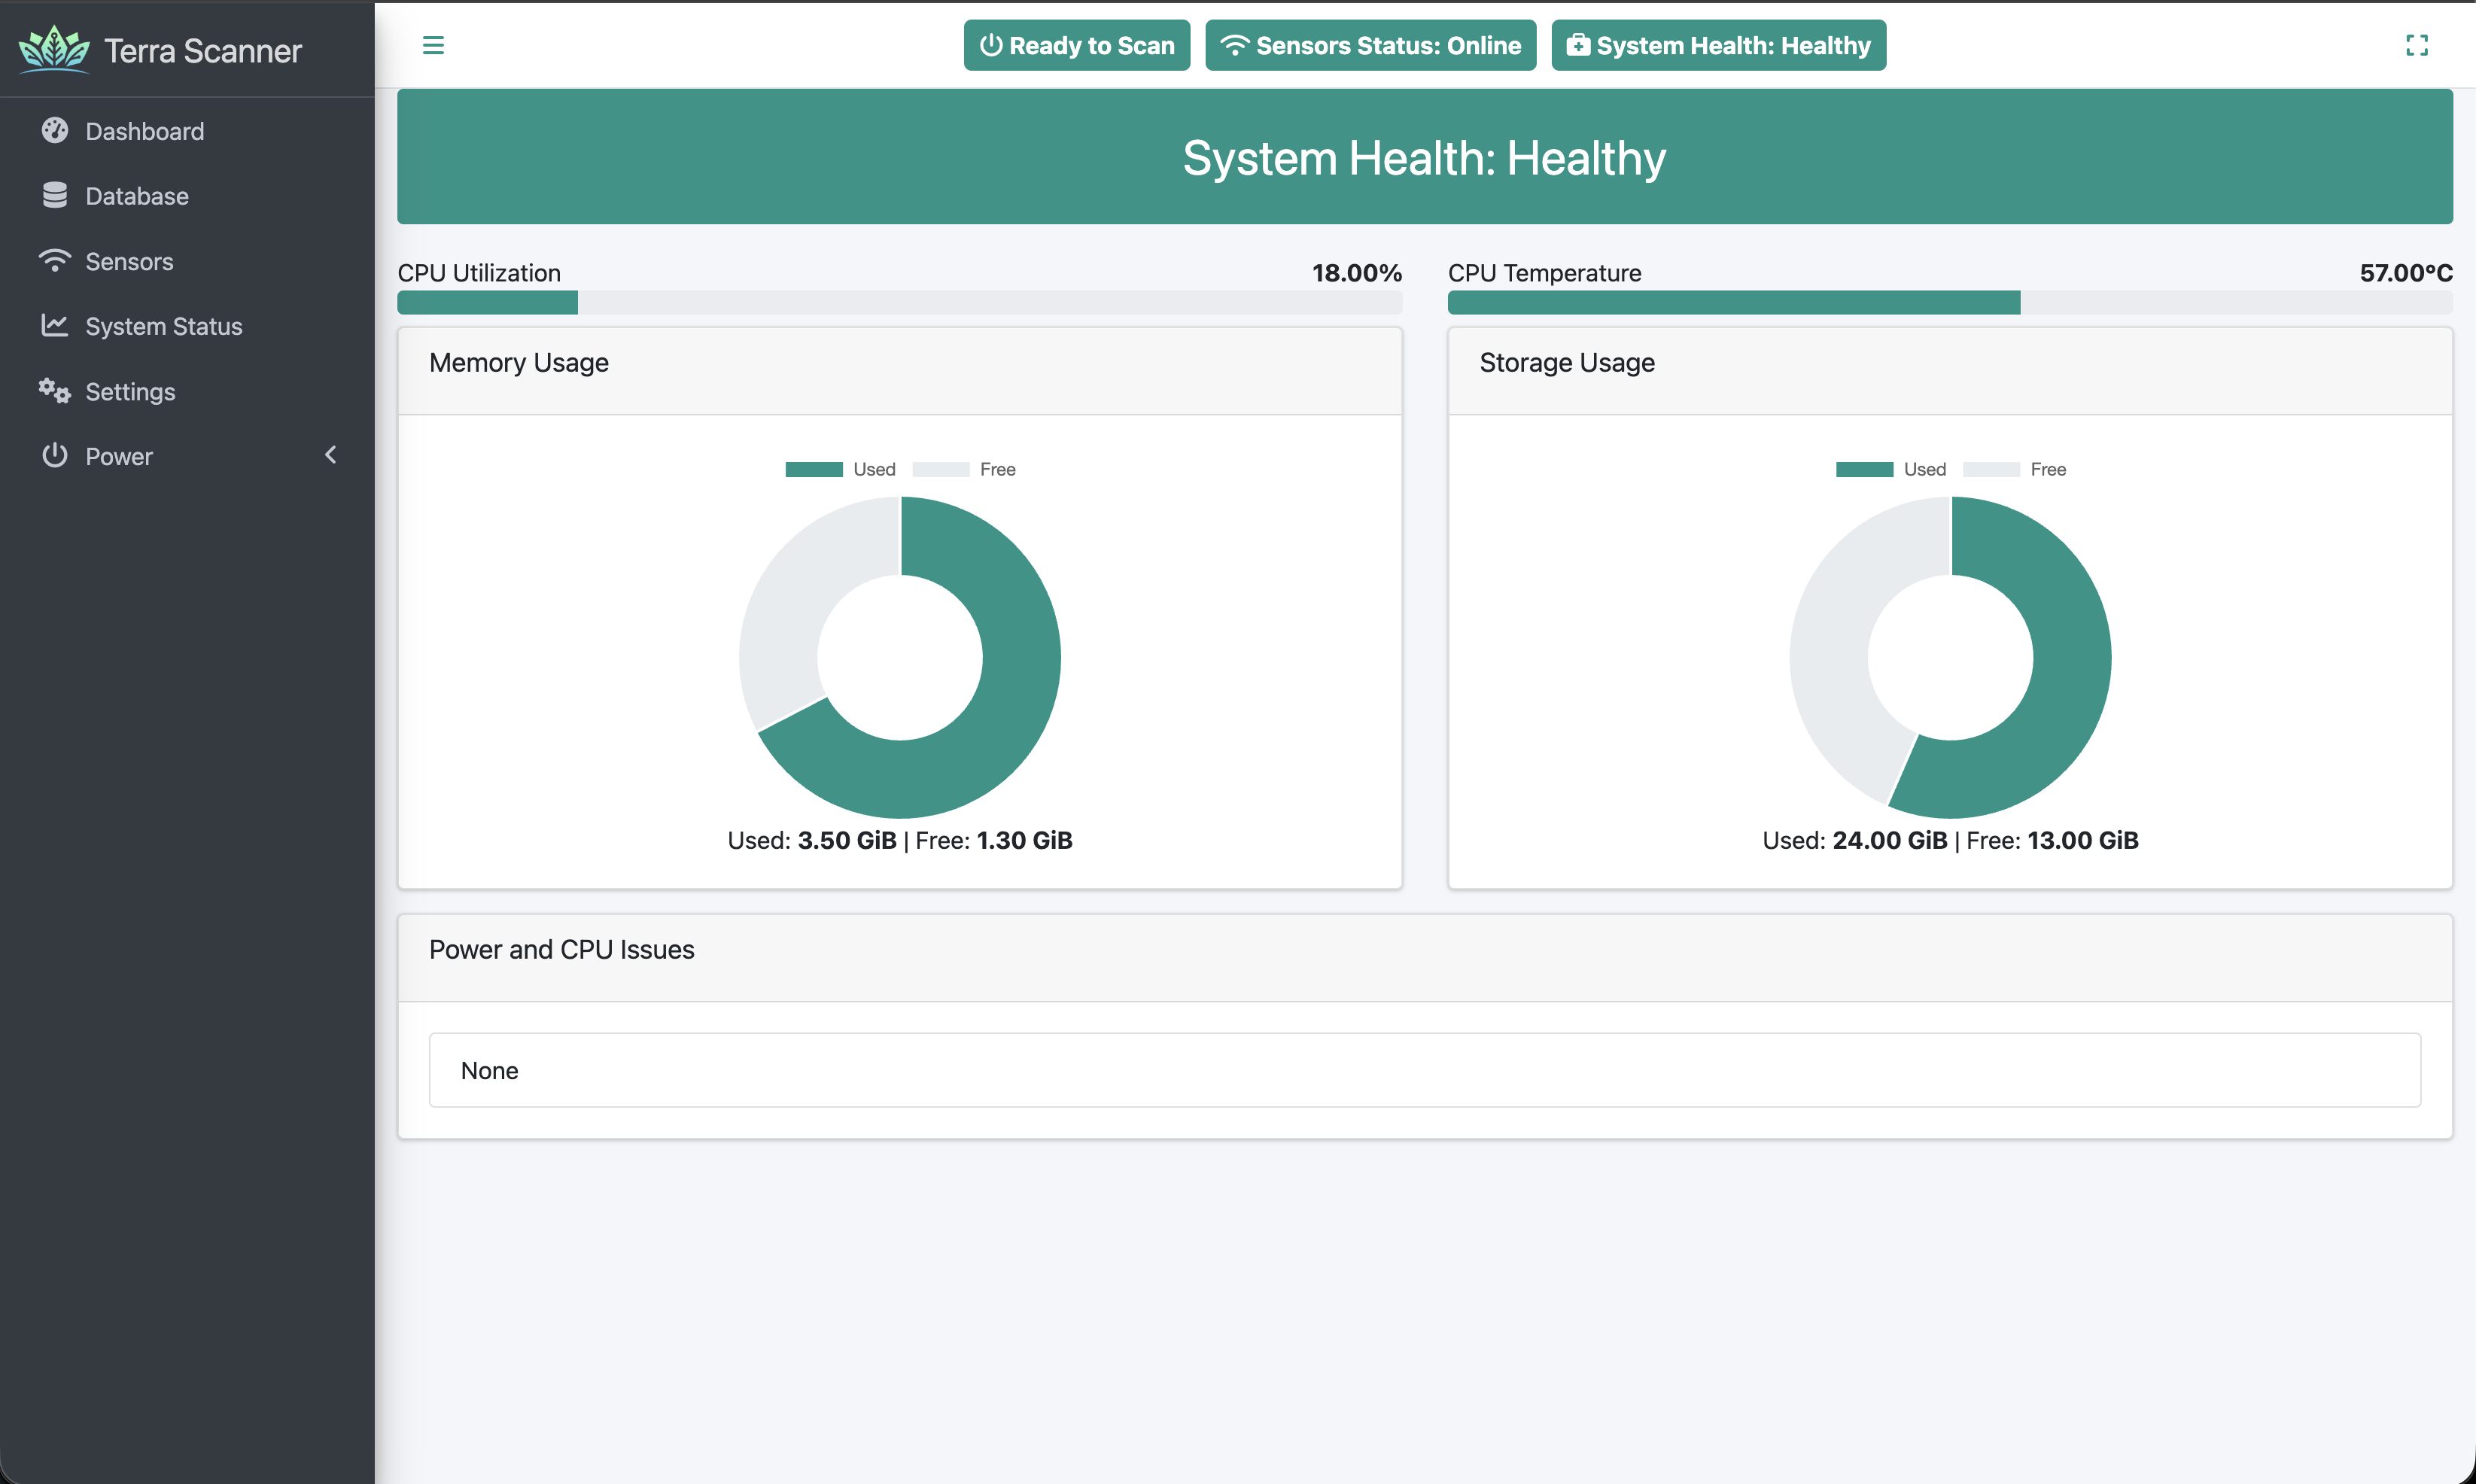
System Status
Scanner hardware and computing system health monitoring:
- CPU: Processing utilization and temperature of the Scanner’s internal computer
- Memory: RAM usage charts and available capacity for data processing
- Storage: Internal storage usage for scan data and system files
- Thermal Management: Temperature monitoring and throttling warnings for field conditions
- Overall Health: System-wide status summary for the Scanner hardware
- Environmental Conditions: Monitoring for the IP67-rated Scanner housing performance
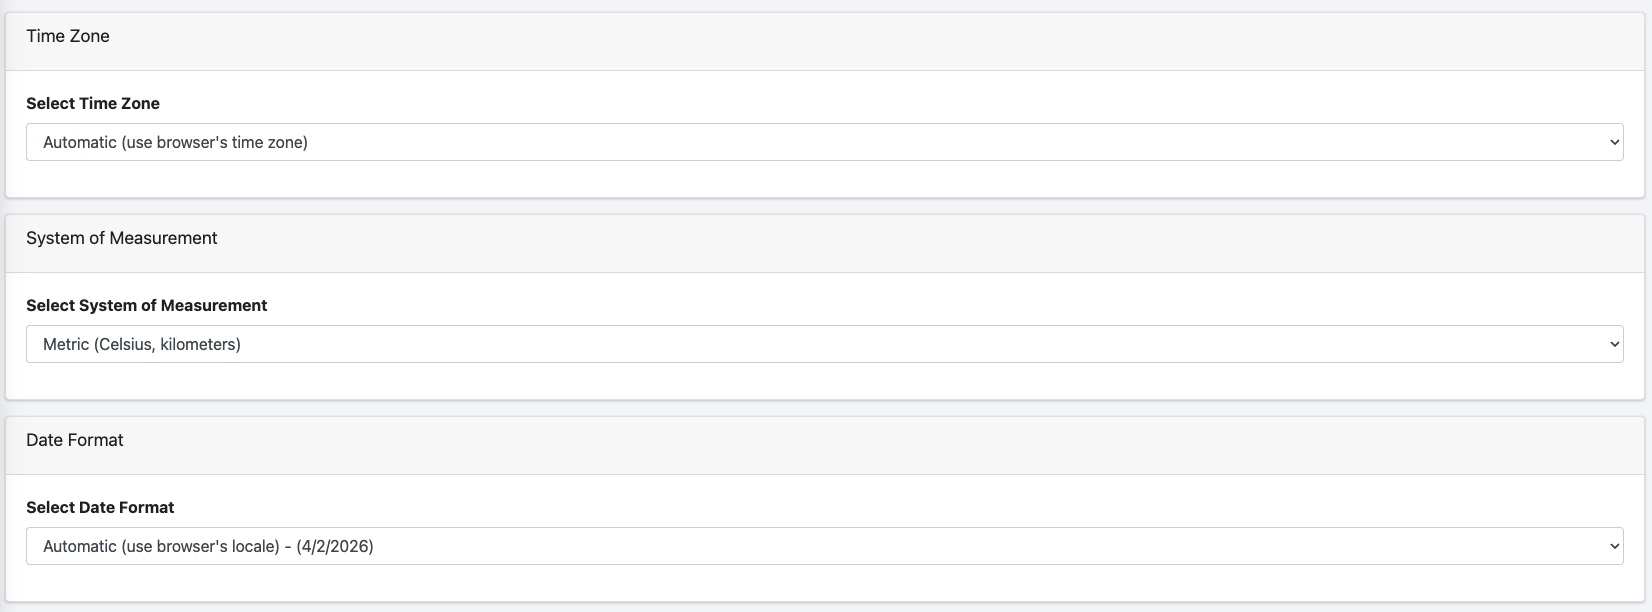
Settings Configuration
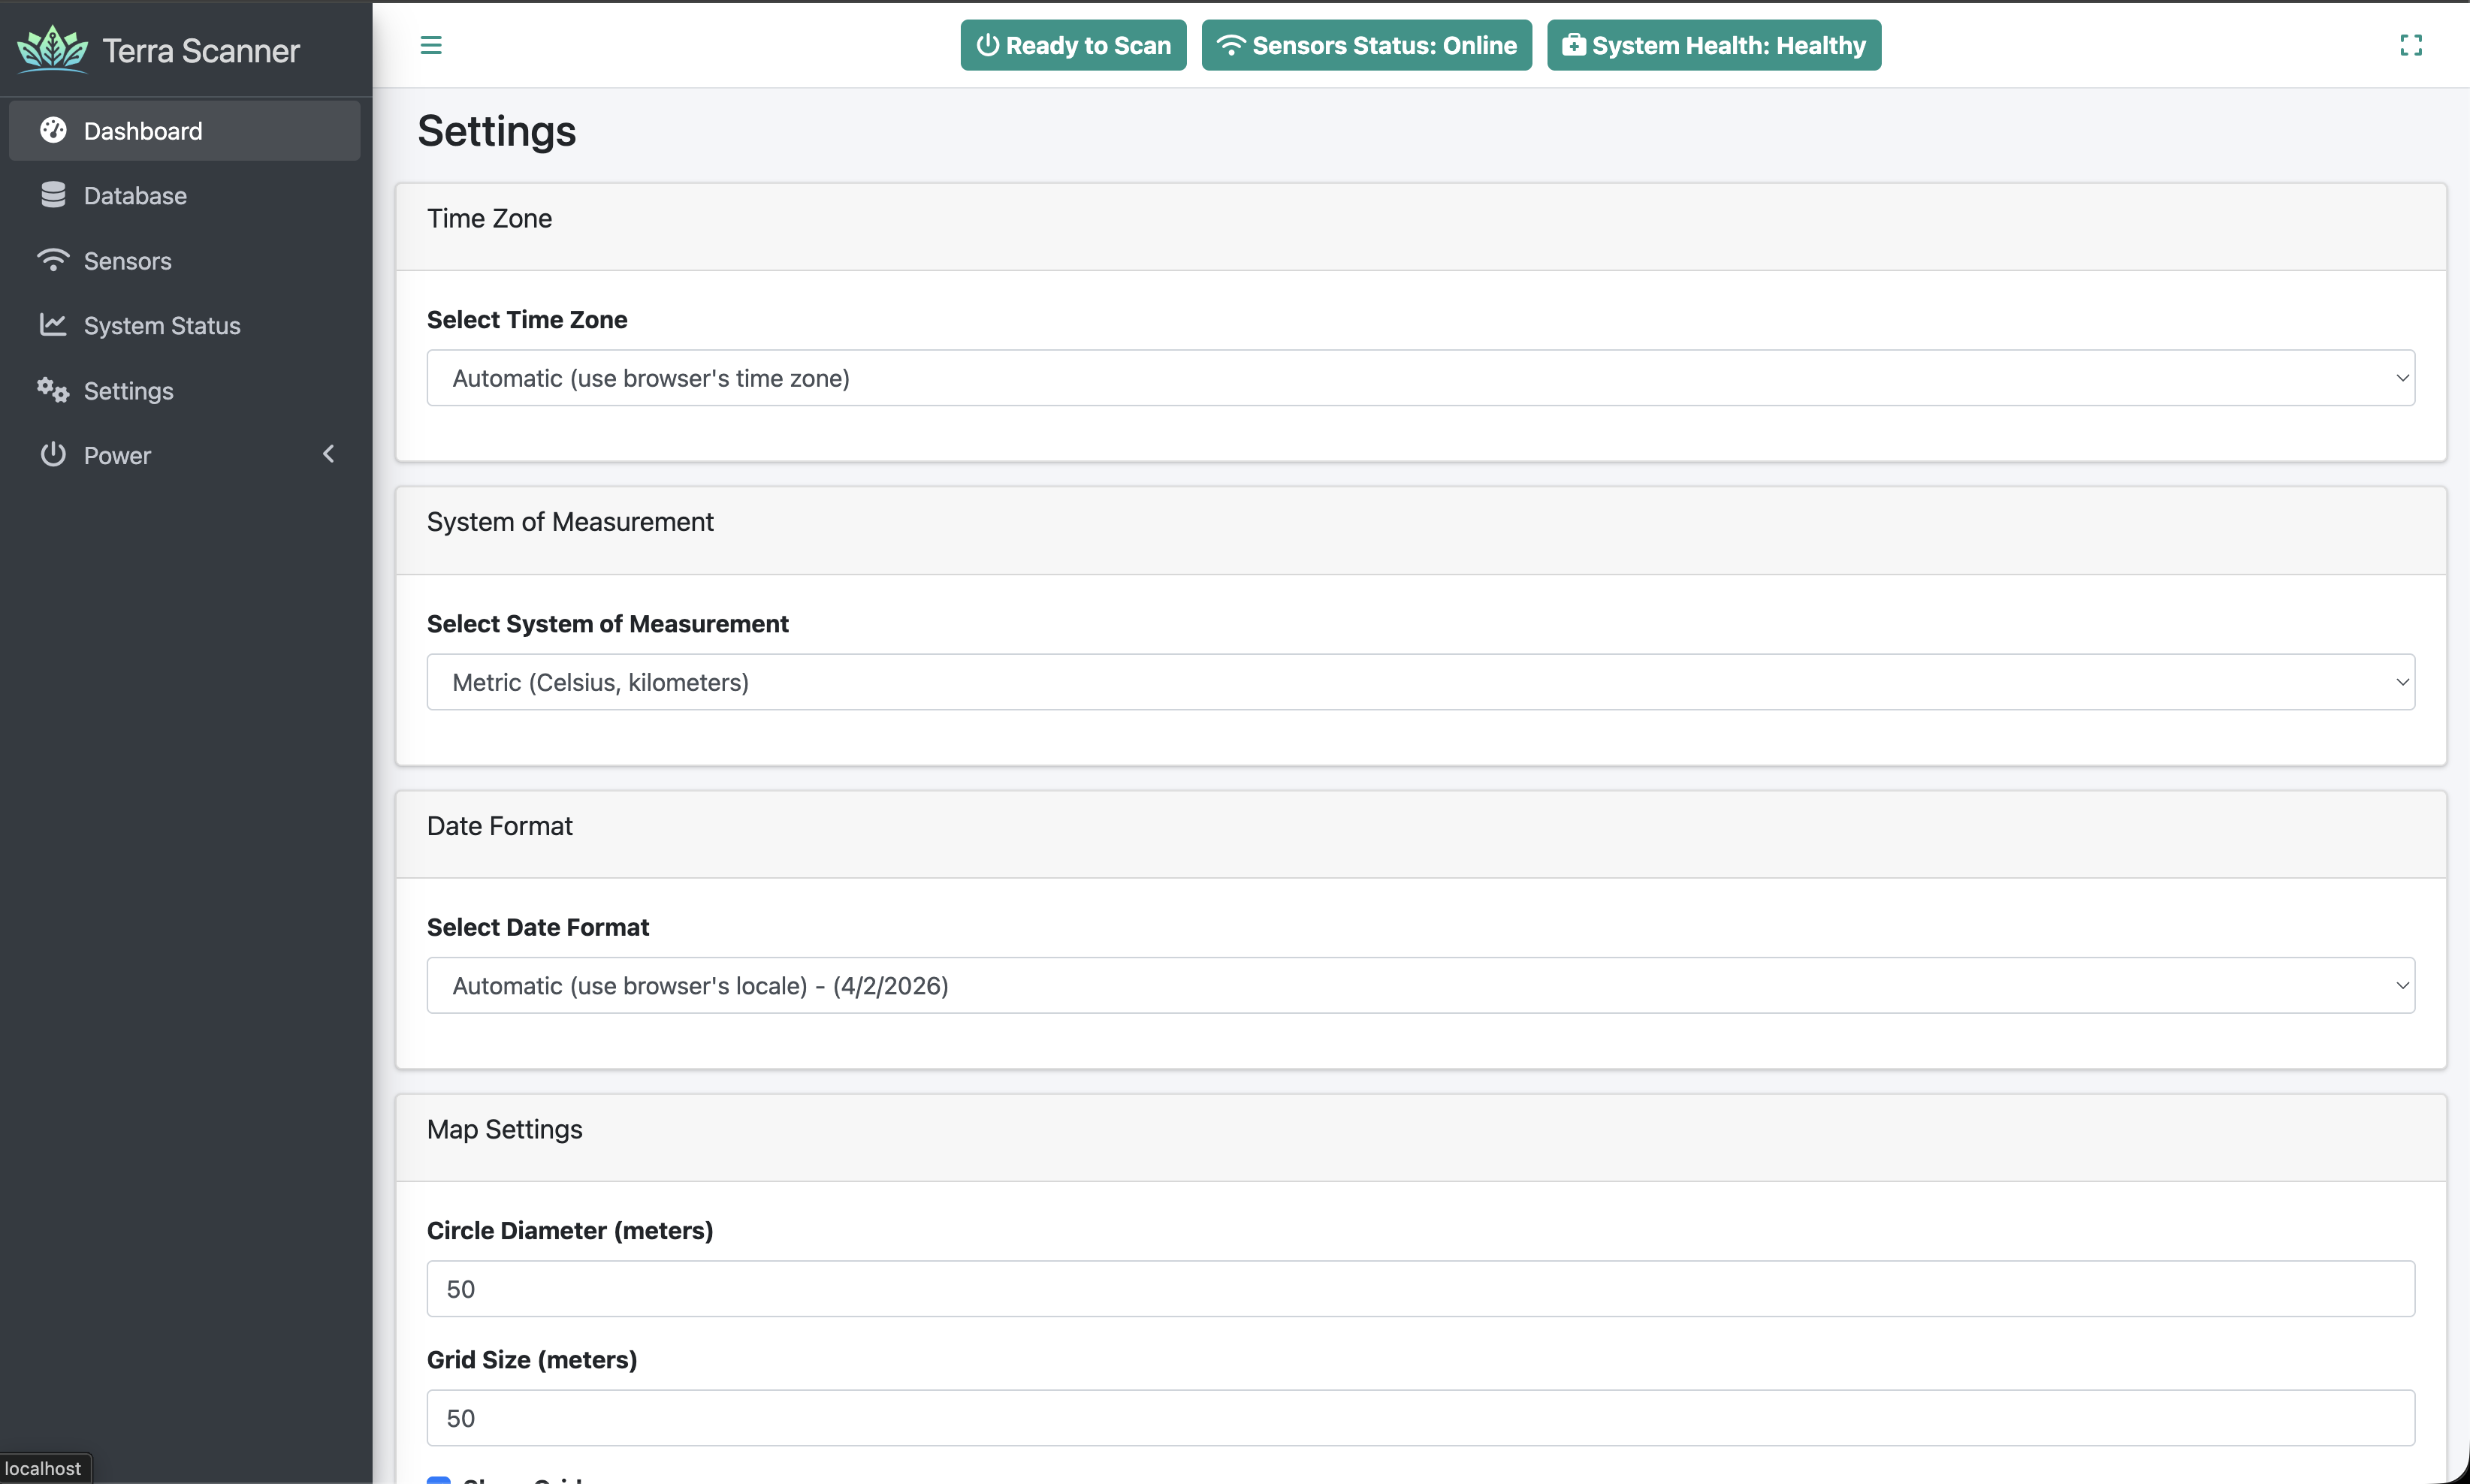
Display Settings
- Time Zone: Automatic or manual selection
- Date Format: Multiple international formats
- Measurement System: Metric or Imperial units
Map Settings
- Default Layer: Satellite, OpenStreetMap, or None
- Grid Display: Default grid visibility and size
- Route Display: Default scan visualization settings
- Scanner Circle: Default diameter for data points
Speed Monitoring
- Speed Warning: Enable/disable speed alerts
- Speed Limit: Configurable threshold for scanning speed
- Unit Display: Automatic conversion based on measurement system

Support Tools
- Support File: Download diagnostic information for technical support

Power Management
Scanner hardware control options:
- Reboot: Restart the Scanner’s internal computing system
- Shutdown: Safely power down the Scanner device (can be restarted by power cycling)
Tips for Optimal Use
Before Scanning
- Physical Setup: Ensure Scanner is properly mounted and powered from vehicle battery
- Sensor Status: Verify all sensors show “Online” status in the web interface header
- GPS Fix: Confirm GPS has a good 3D fix with multiple satellites visible
- System Health: Check Scanner hardware status in System Status page
- Speed Configuration: Set appropriate speed warnings for your scanning requirements
- Wi-Fi Connection: Verify stable wireless connection between tablet/smartphone and Scanner
During Scanning
- Vehicle Speed: Maintain consistent, moderate speed (respect speed warning alerts)
- Scanning Pattern: Follow systematic field coverage patterns for optimal data density
- Real-time Monitoring: Watch all sensor data streams for consistent readings
- Route Visualization: Monitor colored data points appearing on map to verify coverage
- Environmental Conditions: Be aware of weather conditions affecting the IP67-rated Scanner
After Scanning
- Data Processing: Allow the Scanner’s internal processing to complete before stopping
- Status Verification: Confirm scan appears in Database with “Stored” status
- Data Download: Export scan data files promptly after completion
- Backup Storage: Keep original scan files as backup before uploading to Terra Oracle AI Portal
- Equipment Care: Properly clean and store the Scanner hardware after field use
Troubleshooting
- Slow Performance: Check Scanner’s System Status for CPU/memory usage and temperature
- GPS Issues: Ensure clear sky view and check for physical antenna damage
- Sensor Offline: Verify Scanner power connection and hardware status indicators
- Wi-Fi Problems: Check wireless signal strength and Scanner network configuration
- Data Issues: Use support file feature to generate diagnostic information for technical support
This comprehensive guide covers the complete workflow from Scanner setup through data upload to the Terra Oracle AI Portal. The interface is designed for intuitive operation while providing detailed monitoring and control capabilities for professional agricultural scanning operations.